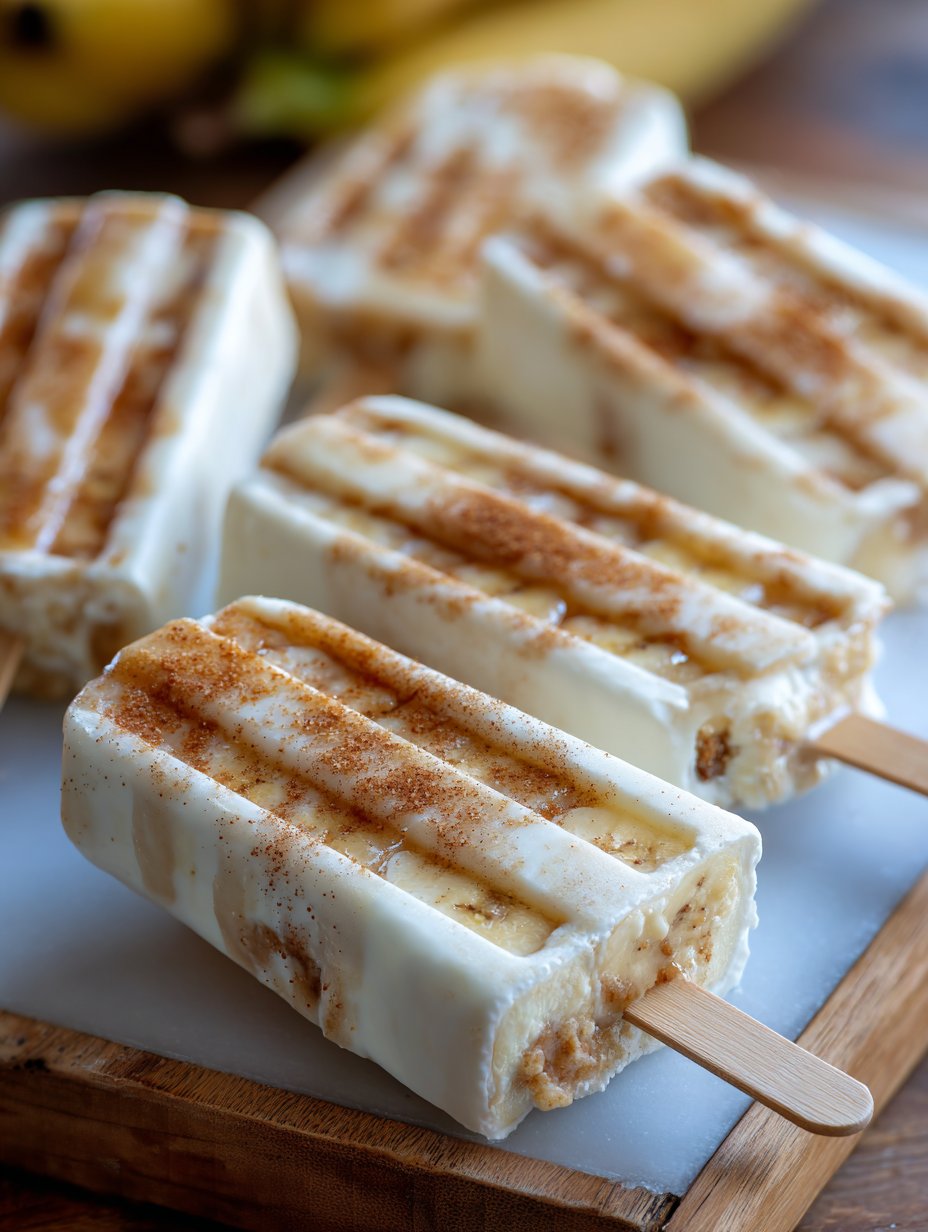
These Banana Pudding Pops Bring Me Right Back
If you’ve ever found yourself standing in front of the freezer at 10 p.m. searching for something cold, sweet, and a little bit nostalgic—hey, you’re in good company. Banana pudding pops are my go-to fix. I started making these after my cousin brought a tray to a July barbecue, and everyone wound up fighting for the last one (my uncle Phil definitely hid two in the garage fridge). The first time I tried to make them, I put the pudding in while it was still way too hot and, well, you can imagine the mess. Live and learn.
Why I Keep Coming Back to This Recipe
I whip these up whenever I want a treat that’s cold and creamy but doesn’t require me to turn on the oven (I mean, who bakes in August?). My family goes bonkers for these pops—especially my youngest, who claims they’re better than anything from the ice cream truck (not sure how the ice cream guy would feel about that). If I forget to make a double batch, there’s usually a squabble over who gets the last one. Also, they’re basically the only dessert my neighbor with a dairy thing will eat, provided I use coconut milk instead. Oh, and something about the way the banana flavor mellows after a night in the freezer, it just hits different.
What You’ll Need (and What I Swap)
- 2 ripe bananas (if they’ve got brown spots, even better—you get a deeper flavor)
- 1 1/2 cups milk (whole milk is lush, but I’ve used oat milk in a pinch—still tasty!)
- 1/2 cup heavy cream (sometimes I just use all milk, or even half-and-half)
- 1/2 cup instant vanilla pudding mix (Grandma swore by Jell-O, but I’ve used store brand and nobody noticed)
- 1/4 cup sweetened condensed milk (optional, but wow does it make it creamy)
- 1 teaspoon vanilla extract
- Pinch of salt
- 1/2 cup crushed vanilla wafer cookies (Nilla is classic, but the crunchy store ones work fine)
- Extra banana slices for the molds (totally optional—sometimes they just fall to the bottom anyway)
How I Actually Make These Pops (and Where I Mess Up)
- Mash the bananas in a big mixing bowl until mostly smooth. Lumps are fine! (Actually, I kinda like a few.)
- Add the milk, cream, pudding mix, sweetened condensed milk (if using), vanilla, and salt. Whisk until it looks like…well, thick banana milk. If you see some pudding clumps, just keep whisking—they’ll sort themselves out. Or not. Still tastes good.
- This is where I usually sneak a taste. If it’s too sweet, add a splash more milk. If it’s bland, a dash more vanilla or an extra banana chunk does wonders.
- Gently stir in about half the crushed wafers. I save the rest for layering.
- Spoon a bit of pudding mix into each popsicle mold, sprinkle with extra wafer crumbs, and if you’re feeling fancy, press a banana slice against the side (looks prettier than it tastes, honestly).
- Fill the molds to the top, then stick in the popsicle sticks. Don’t worry if the sticks don’t stand up perfectly—the pudding is thick, so they usually stay put.
- Freeze for at least 6 hours, but overnight is better. I once tried pulling them out after 3 hours and, well, banana pudding slushies aren’t bad, just not what you’re going for.
- To unmold, run warm water over the outside of the molds for 10-15 seconds. If they won’t budge, I gently wiggle the stick while muttering under my breath (it helps, I swear).
What I’ve Learned (Usually the Hard Way)
- Bananas: The riper, the better. If they’re too green, you’ll miss that mellow sweetness.
- Don’t overfill the molds. The mix expands a bit as it freezes—if you spill some, just lick it off (kidding… kind of).
- If you forget the salt, it’ll taste flat. I’ve done it more than once. Just sprinkle a pinch on top before you freeze if you remember late.
Variations That Actually Work (and One That Doesn’t)
- Tried swapping the wafer cookies for graham crackers—pretty tasty, but not the same. Shortbread cookies were meh.
- Added mini chocolate chips once. The kids loved it, but I found them weirdly crunchy frozen.
- I once went full health-nut and made these with almond milk, chia pudding, and zero cookies. It was…not a hit. Stick with at least some of the classic bits!
- Sometimes I add a swirl of peanut butter—sounds odd, but it’s a thing of beauty if you’re into that combo.
The Gear I Use (And My Jury-Rigged Solution)
A popsicle mold is handy (I use this one from OXO), but in a pinch, I’ve poured the mix into paper cups with plastic spoons stuck in. Works fine—just a bit of a wrestling match to peel the cups off. Oh, and if you don’t own a whisk, a fork and some elbow grease will do the trick.

How I Store (Or Don’t)
Technically, they’ll keep in the freezer for up to a week if you wrap them, but honestly, in my house, they vanish in a day (sometimes before they’re fully set, whoops). If you do need to store extras, pop ’em in a zip-top bag so they don’t pick up freezer funk.
Serving? Here’s What I Do
I usually just hand them out straight from the mold—no frills. But, if it’s a birthday or you want to look like you have your act together, a drizzle of caramel sauce and a sprinkle of extra cookie crumbs on top is a winner. My neighbor dips hers in chocolate shell (like this magic shell recipe), which is pretty genius.
Pro Tips—Learned the Hard Way
- Don’t try to rush the freezing. I once thought I’d be clever and stick them in the deep freeze on the turbo setting. Ended up with icy, gritty pops instead of creamy ones. Patience, grasshopper.
- If you’re using coconut milk, give it a good shake (or stir) first. I forgot once and all the fat settled at the bottom; the result was, shall we say, “textured.” Actually, now I just blend it all together at the start.
FAQ (You Actually Asked!)
Q: Can I use fresh whipped cream instead of heavy cream?
Sure, but it gets a little fluffy (and honestly, you don’t need to fuss that much). Heavy cream or half-and-half is easier.
Q: Do these taste super banana-y?
Yes, but not in a fake way. More mellow, like banana bread that just decided to chill out for summer.
Q: Can I make these without a popsicle mold?
Yep, like I said earlier, paper cups or even little yogurt containers work. Just don’t use shot glasses unless you want to curse loudly trying to get them out (learned this the hard way; not recommended!).
Q: Do I have to use the cookies?
Nah, but I think the crunch is what sets these apart. If you’re gluten-free, there are some good GF vanilla wafers out there (try these guys—they’re not bad at all).
Last thing: if you make these, let me know how they turn out. And if you accidentally eat three in one go, you’re in good company. Happy snacking!
Ingredients
- 2 large ripe bananas
- 1 package (3.4 oz) instant vanilla pudding mix
- 2 cups cold milk
- 1/2 cup heavy cream
- 1/2 teaspoon vanilla extract
- 1/2 cup crushed vanilla wafers
- 2 tablespoons honey
- Pinch of salt
Instructions
-
1In a blender, combine the ripe bananas, honey, and vanilla extract. Blend until smooth.
-
2In a large bowl, whisk together the instant vanilla pudding mix, cold milk, and heavy cream until thickened, about 2 minutes.
-
3Fold the banana mixture into the pudding mixture until well combined. Add a pinch of salt and mix.
-
4Gently stir in the crushed vanilla wafers.
-
5Pour the mixture evenly into popsicle molds. Insert sticks and freeze for at least 4 hours, or until solid.
-
6To serve, run the molds under warm water for a few seconds to release the pops.
Approximate Information for One Serving
Nutrition Disclaimers
Number of total servings shown is approximate. Actual number of servings will depend on your preferred portion sizes.
Nutritional values shown are general guidelines and reflect information for 1 serving using the ingredients listed, not including any optional ingredients. Actual macros may vary slightly depending on specific brands and types of ingredients used.
To determine the weight of one serving, prepare the recipe as instructed. Weigh the finished recipe, then divide the weight of the finished recipe (not including the weight of the container the food is in) by the desired number of servings. Result will be the weight of one serving.
Did you make this recipe?
Please consider Pinning it!!


