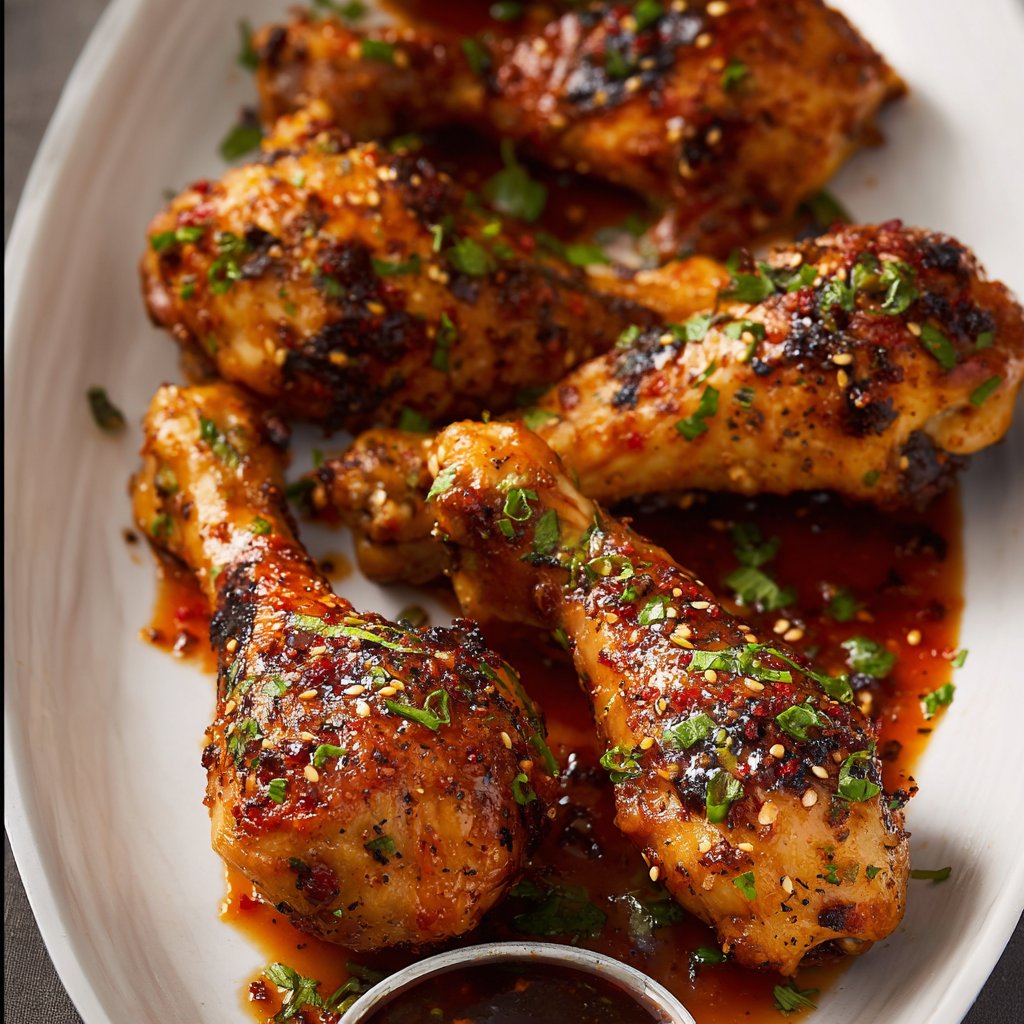
These Air Fryer Drumsticks Have Saved So Many Weeknights
Okay, so confession time — I used to be a bit terrified of frying chicken. Too much oil, too much mess, that weird smell that lingers for days (please tell me I’m not the only one). Then I got my air fryer — it was a birthday gift from my sister, who, by the way, can’t cook an egg — and these drumsticks basically became my go-to. There’s just something about crispy chicken that makes a Tuesday feel special, you know?
Last week, I made these after a long day that felt like it would never end. My youngest actually asked for seconds before I’d even sat down (not sure if I should be proud or slightly offended). Anyway, if you’re after a dinner that’s more reliable than the weather forecast, you’re in the right spot.
Why You’ll Love This (Or, Why I Keep Making It)
- I make these air fryer drumsticks when I’m too tired to think but still want to eat something that tastes like I tried.
- My family actually cheers (out loud, honestly) when they see these on the table — even the picky one who claims he hates chicken, which I still don’t understand.
- They go from fridge to plate in under 30 minutes. And if you forget to defrost, just soak them in warmish water for a bit. Not authentic chef advice, but it works for me.
- No greasy kitchen. That alone is worth its weight in gold.
- I used to burn the skin in the oven, but the air fryer’s way more forgiving (unless you walk away, which, ahem, I may have done once).
What You’ll Need (But Honestly, Sub What You’ve Got)
- 6 chicken drumsticks (skin-on, bone-in, or boneless if that’s what the store had — I’ve used both, though bone-in stays juicier)
- 1 tablespoon olive oil (or melted butter if you’re feeling fancy — once I used canola oil and nobody noticed)
- 1 teaspoon salt (sea salt is nice, but table salt is grand)
- 1/2 teaspoon black pepper
- 1 teaspoon smoked paprika (plain old paprika in a pinch — but smoked is next-level)
- 1/2 teaspoon garlic powder (sometimes I swap in onion powder, or both if I’m feeling wild)
- 1/2 teaspoon dried thyme (or Italian seasoning, honestly, whatever dried green stuff you’ve got in the cupboard works)
- (Optional) A pinch of cayenne for a kick — my husband insists on it, but I sometimes forget and nobody riots
Let’s Get Cooking: How I Actually Do It
- Prep the Drumsticks. Pat the chicken dry with paper towels. Don’t skip this — it helps get that lovely crispy skin. If you forget, it’s not the end of the world, but they might not be as crunchy.
- Season Everything. In a big bowl (or a zip-top bag if you hate dishes), combine the olive oil and all your spices. Toss the drumsticks around until they’re coated. This is where I usually sneak a taste of the seasoning mix just to see if I went heavy enough on the paprika.
- Preheat Your Air Fryer. 400°F/200°C-ish for about 3 minutes. I sometimes skip this if I’m rushing, but it does help make things crisper.
- Arrange the Chicken. Lay the drumsticks in a single layer in the basket. Don’t cram them in — if they’re touching too much, you’ll just get sad, soggy spots.
- Cook. Air fry for 10 minutes, flip them over, then cook for another 10–14 minutes. (Mine are usually perfect right at 22 minutes, but your air fryer might have a mind of its own. I once undercooked by accident — not fun.)
- Check for Doneness. You want 165°F on a meat thermometer, or if you don’t have one, slice into one and peek (clear juices = you’re good). Sometimes I forget to check and have to pop them back in for a few.
Things I’ve Learned (AKA, My Oops Moments)
- Don’t bother marinating for hours. I tried overnight once and honestly, not worth the stress.
- If your basket gets crowded, just do a second batch. Or, you know, save some for lunch tomorrow. (As if that ever happens in my house!)
- Sometimes I line the basket with parchment — sometimes I don’t. I can’t tell the difference, except fewer sticky bits to clean up.
Fun Variations I’ve Tried (And One Regret)
- Honey garlic: Toss with a spoon of honey and minced garlic for the last five minutes (watch closely; honey burns fast).
- Lemon pepper: Ditch the paprika, up the black pepper, and squeeze some fresh lemon over when they’re done. So good.
- BBQ style: Brush with barbecue sauce just before the end. Actually, don’t do it too early or you’ll get that burnt-sugar thing. Ask me how I know.
- Buffalo: Toss with hot sauce and melted butter after cooking. Not everyone’s cup of tea, but it’s got bite.
- Don’t try maple syrup. I thought it’d be clever. It was…not.
What If I Don’t Have an Air Fryer?
So, here’s the thing: I once made these in the oven at 425°F for about 35 minutes, flipping halfway. Not quite the same, but still better than takeout, in my humble opinion. If you don’t have a meat thermometer, the old “poke and see if the juices run clear” trick works fine (just don’t poke too many times or they’ll dry out — been there!).

How to Store ‘Em (If You Have Any Left)
Pop leftovers in an airtight container in the fridge — they’ll keep for 2–3 days, but honestly, they’re usually gone by the next morning in my kitchen. Reheat in the air fryer for 5 minutes to crisp them back up. The microwave’ll work too, but, well, not my favorite.
How I Like to Serve These
Honestly? A pile of drumsticks with a giant salad (or sometimes just chips, don’t judge). My mum used to serve these with buttered corn and potato wedges, so there’s a bit of nostalgia there. Oh, and a quick garlic yogurt dip is never a bad idea.
Things I Learned the Hard Way (A.K.A. Pro Tips)
- Don’t skip drying the chicken. I once rushed and ended up with floppy skin. Not a vibe.
- If you try to double up and layer drumsticks, just… don’t. Stack = soggy. Trust me, learned that the hard way.
- Preheating is worth it. I got lazy once, and, well, it took forever to crisp up.
FAQ, Straight from Messages and Comments
- Can I use frozen drumsticks? Yep! Just add 8–10 minutes to the cook time and check for doneness. Try to separate them as they thaw, though (I once cooked a ‘drumstick brick’ and, well, don’t recommend).
- Do I need to oil the basket? I used to spray it, but honestly, with skin-on chicken, it doesn’t seem to matter much. If you’re using nonstick, you’re grand.
- What if my air fryer is tiny? Just cook in two batches. Or, get a bigger air fryer (kidding, but also…)
- Best place to get drumsticks? I usually grab mine at the local butcher, but supermarket packs are just fine — some folks rave about organic, but I go for what’s on sale. If you want more info, Serious Eats has a great drumstick guide here.
- Can I use this seasoning on wings? Absolutely. Actually, the spice mix is good on potatoes too — just toss with oil and roast. If you want other air fryer ideas, Skinnytaste has loads.
Anyway, if you give these air fryer drumsticks a go, let me know how it goes! Or if you end up inventing a new twist, spill the beans. The kitchen’s meant for a bit of chaos, if you ask me.
Ingredients
- 8 chicken drumsticks
- 2 tablespoons olive oil
- 1 teaspoon garlic powder
- 1 teaspoon smoked paprika
- 1 teaspoon onion powder
- 1/2 teaspoon salt
- 1/2 teaspoon black pepper
- 1/2 teaspoon dried thyme
Instructions
-
1Preheat the air fryer to 400°F (200°C) for 3-5 minutes.
-
2Pat the chicken drumsticks dry with paper towels. Place them in a large bowl.
-
3Drizzle olive oil over the drumsticks. Add garlic powder, smoked paprika, onion powder, salt, black pepper, and dried thyme. Toss to coat evenly.
-
4Arrange the drumsticks in a single layer in the air fryer basket, making sure they are not overcrowded.
-
5Cook for 25 minutes, turning the drumsticks halfway through, until the skin is crispy and the internal temperature reaches 165°F (74°C).
-
6Remove from the air fryer and let rest for a few minutes before serving.
Approximate Information for One Serving
Nutrition Disclaimers
Number of total servings shown is approximate. Actual number of servings will depend on your preferred portion sizes.
Nutritional values shown are general guidelines and reflect information for 1 serving using the ingredients listed, not including any optional ingredients. Actual macros may vary slightly depending on specific brands and types of ingredients used.
To determine the weight of one serving, prepare the recipe as instructed. Weigh the finished recipe, then divide the weight of the finished recipe (not including the weight of the container the food is in) by the desired number of servings. Result will be the weight of one serving.
Did you make this recipe?
Please consider Pinning it!!


