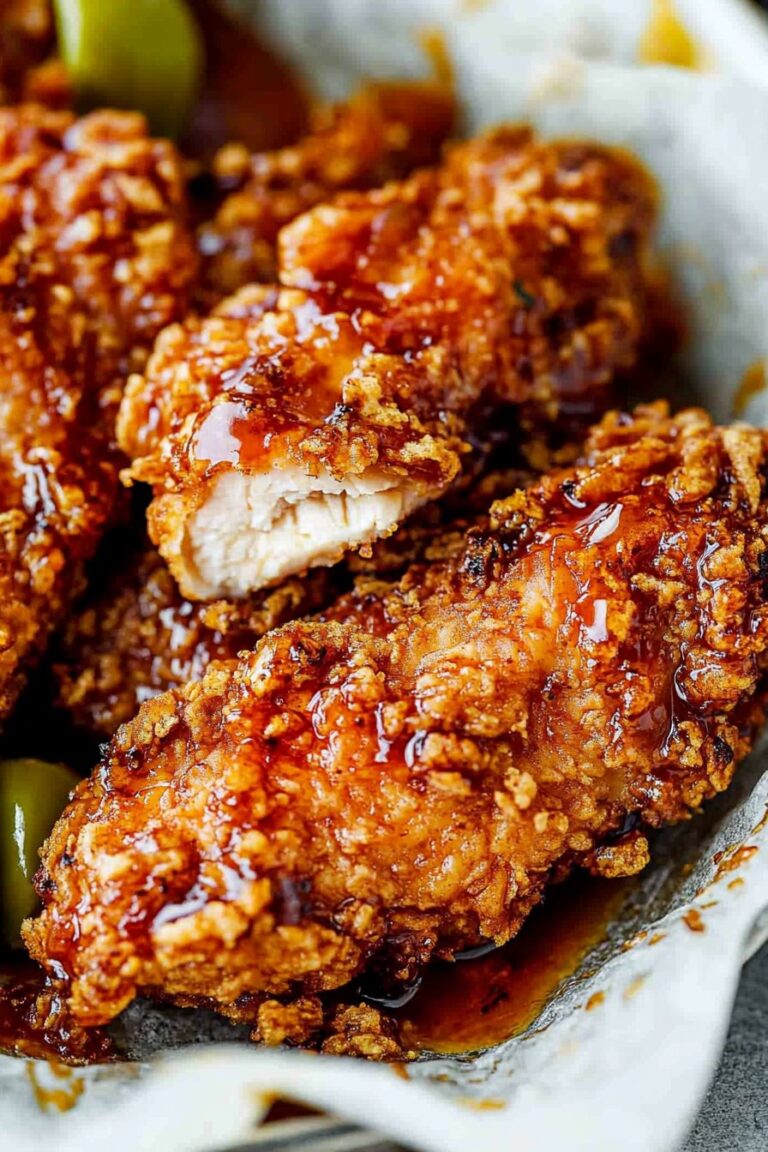
So, Here’s Why I Keep Making These Baked Hot Honey Chicken Tenders
You ever crave something that’s both crunchy and sticky—like, in a good way? That was me last Tuesday. Or, honestly, most weeks. My first attempt at these Baked Hot Honey Chicken Tenders was after a soccer game ran late and I needed dinner fast, but wanted that spicy-sweet kick (oh, and less mess than deep frying). I still remember the kids arguing over the last tender—which is, I guess, a win? I make these when I want everyone happy and my kitchen not smelling like an oil slick for days. And the best part? You can totally adjust how hot you want ’em. My family goes crazy for these because they’re basically takeout vibes but in sweatpants at home. Plus, let’s be real, who can resist a sticky, spicy glaze on anything?
Why You’ll Love This (Or Why I Do, Anyway)
I make these when I want something easy but a little special—it’s a weeknight dinner upgrade, you know? My husband says the leftovers are even better cold (not my thing, but, hey). I used to hate how baked chicken never got as crispy as fried, but honestly, these are pretty darn close—especially if you crank the oven and don’t skimp on the panko. Sometimes I double the hot honey just to have extra for dipping (not judging if you do, too). And if you’ve ever wrestled with a deep fryer, you know why I never go back.
Gather These Ingredients (Substitutions Welcome!)
- 1 pound chicken tenders (I sometimes just slice up boneless chicken breasts if that’s what I’ve got—no drama)
- 1 cup panko breadcrumbs (my gran always swore by Progresso, but whatever is in the pantry works)
- 1/2 cup plain flour (all-purpose, but once I used whole wheat—didn’t love it, but it worked)
- 2 large eggs
- 1 teaspoon garlic powder
- 1 teaspoon smoked paprika (regular paprika is fine, too; not gonna gatekeep your spice rack)
- Salt and pepper, a decent pinch of each
- 1 tablespoon olive oil (or melted butter if you’re feeling cheeky)
- For the Hot Honey: 1/3 cup honey, 2-3 teaspoons hot sauce (Frank’s is my go-to, but Sriracha works in a pinch), 1 teaspoon apple cider vinegar
Let’s Make Baked Hot Honey Chicken Tenders (Trust the Process!)
- Preheat your oven to 425°F (grab a cuppa while it heats, if you like).
- Line a baking tray with parchment or foil—less mess later (sometimes I skip this and regret it every time, so, your choice!).
- Set up your breading station: in one bowl, mix flour, half the salt, pepper, garlic powder, and paprika. In another, beat the eggs. In a third, the panko and olive oil get a quick toss (the oil makes it crispy—don’t skip, unless you’re out, then just cross your fingers it gets crunchy enough).
- Coat the chicken: flour first (shake off excess), then egg, then into the panko, pressing a bit so it really sticks. This is where I usually sneak a taste of the panko (raw panko, I know, but I’m impatient).
- Arrange the tenders on the tray—don’t crowd them or they’ll steam not crisp. Trust me, I learned the hard way.
- Bake for 18-22 minutes, flipping halfway through if you remember (if not, no biggie; they’ll still crisp up on the bottom mostly).
- While the chicken’s baking, make the hot honey: microwave the honey, hot sauce, and vinegar for about 30 seconds, stir, and taste. Need it hotter? Add more sauce. (Actually, I find it works better if you heat the honey first then stir in the hot sauce, but both ways work.)
- When the tenders are golden and cooked through, brush or drizzle with the hot honey. Or, dunk them directly—no judgment here.
Some Notes I Wish I Knew the First Time
- If your panko looks pale at the end, broil for 1-2 minutes—just don’t walk away, they go from pale to scorched quick.
- Soggy bottom? Try elevating the chicken on a rack. But honestly, mine sometimes get a little soggy and I just eat them anyway.
- Crumbs everywhere? Welcome to breaded chicken. I just sweep it up after.
Variations I’ve Tried (and a Fail or Two)
- Swap hot sauce for chili oil if you want a different heat—it’s fun, but go easy, it sneaks up on you.
- For gluten-free, I use rice flour and gluten-free panko; works pretty well, though the crumbs sometimes fall off more.
- One time I tried maple syrup instead of honey… honestly, way too sweet. Wouldn’t recommend, unless you’re a maple superfan.
What If I Don’t Have… (Equipment Stuff)
- Baking rack: I say it’s helpful, but when I can’t find mine I just put the chicken straight on the tray—it’s fine, just flip ‘em halfway.
- Parchment paper: Foil works, or just grease the pan. Cleanup’s a bit more, but you do you.

How to Store These (If Any Survive)
Let them cool, then stick in an airtight container in the fridge for up to 3 days. They reheat best in a hot oven for 10 mins—microwave makes them a bit sad, but edible. Though honestly, in my house it never lasts more than a day! If you want to freeze them, lay them out on a tray to freeze first so they don’t get stuck together, then pop in a bag. They’ll last a month or so, but I rarely have leftovers to test this much.
What Do You Serve These With? (My Two Cents)
I love these with a pile of crunchy slaw (like this coleslaw recipe) or just some fries if I’m feeling lazy. My kids dunk them in ranch, but I’m a hot honey purist—more for me. Sometimes I add pickles on the side, which is, weirdly, awesome. And if it’s a grown-ups only night, a cold beer is perfect (just saying).
Lessons I’ve Learned (AKA Pro Tips)
- Don’t rush the breading or it’ll all slide off. I once tried to do it too fast and ended up with naked chicken. Not a good look.
- Pre-toasting panko in a dry pan gives even more crunch—but honestly, I only bother if I’m feeling fancy.
- If you double the honey glaze, save some for dipping. Trust me, you’ll want it.
FAQ (Or Stuff Friends Have Texted Me)
- Can I make these less spicy? Totally—use less hot sauce, or just honey if you want. My toddler eats them with just a tiny splash.
- Can I use chicken thighs? Yep, just slice ‘em thin. They’re juicier, but a bit messier to bread. Worth it though.
- Can I air fry these? Oh yeah! 400°F for about 10-12 mins, shake halfway. Actually, I find it works even better if you spray them with a bit of oil first.
- Any good recipes to use leftover hot honey? Drizzle on pizza crust! Or toast—seriously, it’s amazing. I found another idea here if you want to get creative.
- My breading falls off. Why? Don’t rush, press it on, and, if you can, let the breaded chicken rest for 10 mins before baking (I sometimes forget this, so don’t stress if you do too).
And, okay, random aside: the first time I made these, I dropped my bowl of panko on the floor. Still finding crumbs in corners weeks later. It’s just part of the experience, I guess.
Got any tweaks or disasters to share? I’d love to hear about them—makes me feel better about my own kitchen chaos. Happy cooking!
Ingredients
- 1 lb chicken tenders
- 1 cup panko breadcrumbs
- 1/2 cup all-purpose flour
- 2 large eggs
- 1/2 teaspoon garlic powder
- 1/2 teaspoon smoked paprika
- 1/2 teaspoon salt
- 1/4 teaspoon black pepper
- 1/3 cup honey
- 2 tablespoons hot sauce
- 1 tablespoon melted butter
- Cooking spray
Instructions
-
1Preheat oven to 425°F (220°C). Line a baking sheet with parchment paper and lightly coat with cooking spray.
-
2Set up a breading station: Place flour in one bowl, beat eggs in a second bowl, and combine panko breadcrumbs, garlic powder, smoked paprika, salt, and black pepper in a third bowl.
-
3Dredge each chicken tender in flour, dip in beaten eggs, then coat with the seasoned panko mixture. Arrange tenders on the prepared baking sheet.
-
4Lightly spray the tops of the chicken tenders with cooking spray. Bake for 22-25 minutes, flipping halfway, until golden and cooked through.
-
5While chicken bakes, whisk together honey, hot sauce, and melted butter in a small bowl to make the hot honey glaze.
-
6Remove tenders from oven and immediately brush with hot honey glaze. Serve warm.
Approximate Information for One Serving
Nutrition Disclaimers
Number of total servings shown is approximate. Actual number of servings will depend on your preferred portion sizes.
Nutritional values shown are general guidelines and reflect information for 1 serving using the ingredients listed, not including any optional ingredients. Actual macros may vary slightly depending on specific brands and types of ingredients used.
To determine the weight of one serving, prepare the recipe as instructed. Weigh the finished recipe, then divide the weight of the finished recipe (not including the weight of the container the food is in) by the desired number of servings. Result will be the weight of one serving.
Did you make this recipe?
Please consider Pinning it!!


