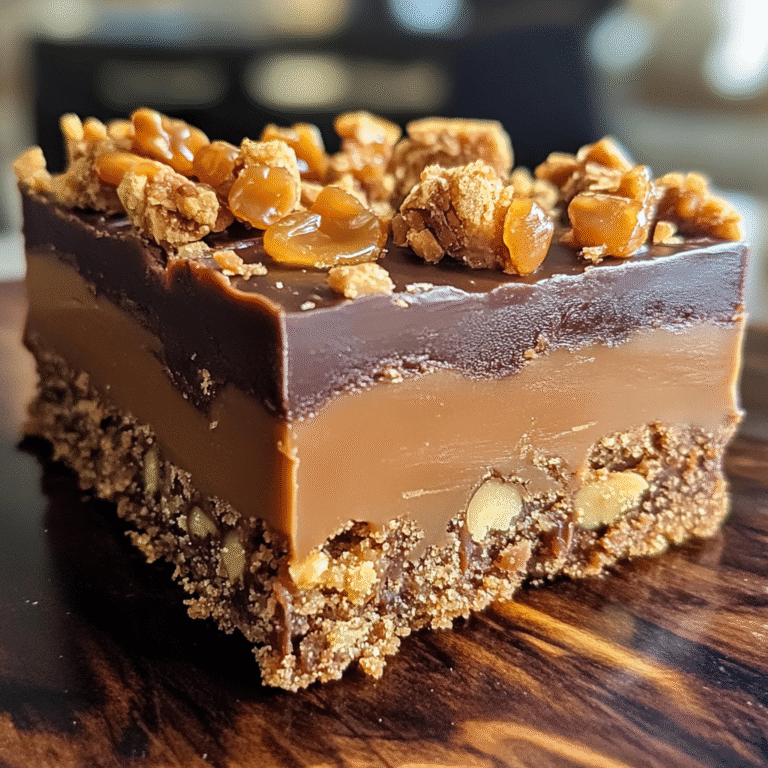
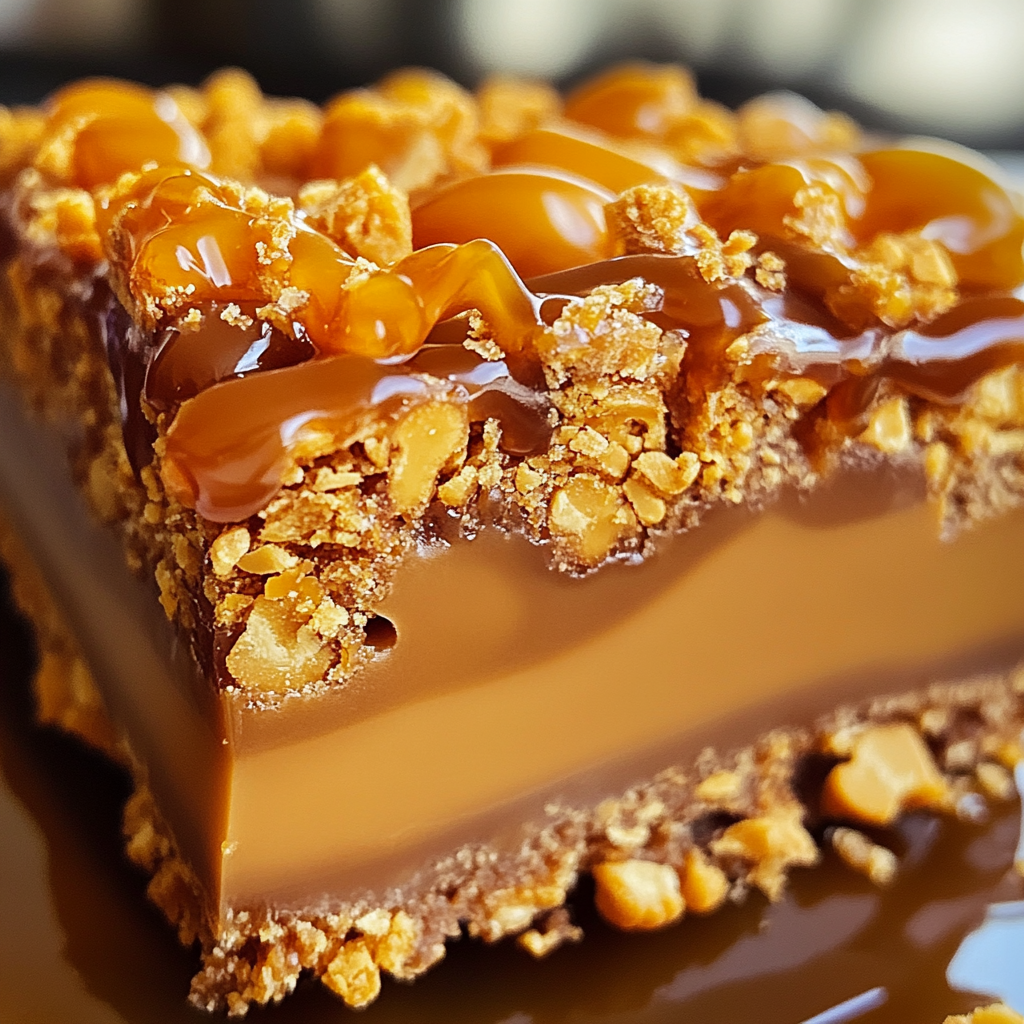
When the sun’s out and the days are long, the last thing you want to do is turn on the oven. That’s where these Butterfinger Caramel Crunch Bars come in—a no-bake, layered treat that’s cool, creamy, crunchy, and just the right amount of decadent. They’re a throwback to fairgrounds and family picnics, with layers of graham crackers, rich caramel, velvety peanut butter, and a satisfying Butterfinger candy crunch.
Growing up, my favorite part of summer was sneaking a Butterfinger bar out of the freezer, letting it soften just enough before that first crunchy bite. My grandmother used to crush them into her homemade desserts—always in some clever, over-the-top fashion. This recipe is inspired by one of her summer classics, reimagined into an easy-to-make, crowd-pleasing dessert that hits all the right notes: sweet, salty, gooey, and crisp.
Why You’ll Love These Butterfinger Caramel Crunch Bars
- No oven required – perfect for hot summer days.
- Layered texture – buttery graham base, gooey caramel, creamy peanut butter, and crisp Butterfinger topping.
- Make-ahead friendly – chill them in advance and slice just before serving.
- Crowd pleaser – these bars vanish fast at potlucks and parties.
- Customizable – tweak the layers to your liking with nuts, chocolate, or different candies.
Ingredients You’ll Need
For the Base Layer:
- 1 ½ cups graham cracker crumbs (about 10 full sheets)
- ½ cup unsalted butter, melted
- ¼ cup brown sugar
For the Caramel Layer:
- 1 can (14 oz) sweetened condensed milk
- ½ cup brown sugar
- ¼ cup unsalted butter
- 2 tablespoons light corn syrup
- Pinch of salt
For the Peanut Butter Layer:
- 1 cup creamy peanut butter
- 1 tablespoon unsalted butter
- ½ cup powdered sugar
For the Chocolate & Butterfinger Topping:
- 1 ½ cups milk chocolate chips
- 1 tablespoon coconut oil or butter (optional, for smoother melting)
- 4 Butterfinger candy bars, crushed
Equipment Needed
- 8×8 or 9×9-inch square baking pan
- Parchment paper
- Medium saucepan
- Mixing bowls
- Rubber spatula
Step-by-Step Instructions
Step 1: Make the Graham Cracker Crust
- In a bowl, combine graham cracker crumbs, melted butter, and brown sugar.
- Press the mixture into a parchment-lined square baking pan.
- Chill in the fridge for at least 15 minutes to set.
Step 2: Prepare the Caramel Layer
- In a medium saucepan, stir together the condensed milk, brown sugar, butter, corn syrup, and salt.
- Heat over medium, stirring constantly, until the mixture thickens and turns a light golden brown (about 10 minutes).
- Pour the hot caramel over the chilled crust and spread evenly.
- Return to the fridge for 20–30 minutes, or until the caramel is firm to the touch.
Step 3: Mix the Peanut Butter Layer
- In a microwave-safe bowl, combine peanut butter and butter. Heat in 15-second bursts until smooth.
- Stir in powdered sugar until well incorporated.
- Spread the peanut butter layer over the cooled caramel.
Step 4: Chocolate & Butterfinger Topping
- Melt chocolate chips and coconut oil (if using) in the microwave in 20-second intervals, stirring until smooth.
- Pour over the peanut butter layer and smooth with a spatula.
- Sprinkle crushed Butterfinger bars generously over the top.
- Chill the bars for at least 2 hours before slicing.
Tips for the Perfect Crunch Bars
- Use fresh Butterfinger bars – older bars tend to lose their crunch and flavor.
- Line your pan well – parchment makes lifting and slicing a breeze.
- Chill thoroughly – don’t rush the cooling; each layer sets better with time.
- Cut with a hot knife – run a knife under hot water and wipe dry between slices for cleaner edges.
How to Store and Serve
- Storage: Store in an airtight container in the refrigerator for up to 5 days.
- Freezer-friendly: Wrap individually and freeze for up to 2 months. Thaw in the fridge overnight.
- Serving: Best served cold or slightly chilled on warm summer days.
Variations & Add-Ins
Want to make these bars your own? Here are some fun tweaks:
- Nutty Crunch Bars: Add a handful of chopped peanuts to the caramel layer.
- Salted Caramel: Sprinkle flake salt over the caramel for that sweet-salty contrast.
- Chocolate Lovers’ Version: Use dark chocolate instead of milk, or layer in chocolate ganache.
- Add Pretzels: Crushed pretzels in the base or on top for added salt and crunch.
Butterfinger Nostalgia: A Bit of Candy History
Did you know Butterfinger was invented in 1923? Its crispety-crunchety peanut-buttery flavor became a classic American favorite thanks to aggressive marketing and, later, The Simpsons (remember Bart’s “Nobody better lay a finger…” line?). Its iconic flaky layers lend themselves beautifully to desserts like this one, where they maintain their texture and blend into gooey layers.
Why This Recipe Is Perfect for Summer
These bars don’t just skip the oven—they embrace everything summer desserts should be:
- Easy to make in batches for events or BBQs.
- Cool and creamy when served straight from the fridge.
- Travel well when chilled in a tight container.
- Use candy instead of fresh fruit so they last longer in heat.
Plus, there’s just something about biting into a cold, crunchy bar that screams picnic table, paper plate, sticky fingers, and summer laughter.
Pairing Suggestions
Here are a few drinks and sides that pair well with these bars:
- Iced coffee or cold brew with vanilla creamer.
- Strawberry lemonade or sparkling peach tea.
- Mint chocolate chip milkshake for the ultimate sweet indulgence.
- Fresh berries and whipped cream for a lighter contrast.
Frequently Asked Questions
Can I make these bars gluten-free?
Yes! Use gluten-free graham crackers for the crust.
Are these bars too sweet?
They are definitely a sweet treat, but using dark chocolate or adding sea salt can help balance the flavors.
What’s the best way to crush Butterfingers?
Use a rolling pin over a sealed zip-top bag, or pulse gently in a food processor. Don’t overdo it—you want chunks, not powder!
Final Thoughts
These Butterfinger Caramel Crunch Bars bring together the best parts of childhood candy bars, summer fun, and no-fuss baking. They’re sweet, satisfying, and destined to become a go-to for your warm-weather gatherings. Whether you’re serving them at a barbecue, packing them for a picnic, or just treating yourself on a hot day—these bars deliver.
So go ahead, embrace your inner kid, and don’t forget to sneak one from the fridge when no one’s looking. 😉


