
Let’s Talk Chocolate Rice Krispie Balls (and a Little Nostalgia)
You know those recipes that just follow you through life like an old favorite jumper? Well, these Chocolate Rice Krispie Balls are that for me. I first made them because, honestly, I was too lazy to bake a cake for my cousin’s birthday and needed something sweet in a half-hour flat. Ended up making them every year since — and not just for birthdays. One time I forgot to let them cool and they were basically gooey chocolate puddles, but folks still ate them! Shows you can’t go too far wrong. If you’ve got kids around, prepare for them to sneak handfuls (not that I’m any better, let’s be honest). And if the kitchen gets messy, just call it ‘creative chaos,’ right?
Why I Always Come Back to This Recipe
I make this when I want something that seems impressive but is really just a cheeky shortcut. My family goes mad for these at Christmastime (but also in July, not gonna lie). I used to try and keep the chocolate ratio perfect, but now I just eyeball it. It still works out! Plus, if you’re after a gluten-free treat, this one’s a doddle (as my gran would say). The only snag is that, if you leave them in plain sight, they’ll vanish faster than socks in the laundry. Oh, and if you’ve ever tried rolling them before the mix cools, you know the struggle — sticky hands for days. Not fun, but kind of inevitable if you’re as impatient as me.
Stuff You’ll Need (But Feel Free to Improvise)
- 3 cups Rice Krispies (sometimes I use the supermarket’s own brand; the kids never notice)
- 1 cup semi-sweet chocolate chips (my gran swears by Cadbury, but honestly, whatever’s left in the cupboard works)
- 1/2 cup peanut butter (crunchy or smooth, both work — or swap for sunflower butter if you’ve got allergies around)
- 1/4 cup honey (maple syrup also does the trick, though it’s a bit runnier)
- 2 tbsp butter (salted or unsalted, I’m not fussy)
- Pinch of salt (unless your butter’s already salted, then maybe skip it)
- Optional: sprinkles, mini marshmallows, or chopped nuts for rolling — I’ve even tossed in some raisins once (jury’s out on that one)
How I Usually Throw These Together
- Get a biggish saucepan, toss in the butter, peanut butter, and honey. Melt them together on a low-ish heat, stirring so nothing burns (this is when I usually check my phone, but don’t let it boil, or you’ll end up with a weird texture — trust me).
- Turn off the heat; stir in your chocolate chips. They’ll melt and make everything look gloriously chocolatey. This is where I sneak a taste (don’t tell the kids).
- Dump in the Rice Krispies. Mix gently till every bit is coated. If it looks a bit dry, you can add a splash more honey or a handful more chips — nothing’s set in stone here. It might look like a hot mess at first, but it all comes together.
- Let it cool for, I dunno, 10 minutes? If you try rolling straight away, prepare for chocolate hands. Actually, maybe go make a cup of tea in the meantime.
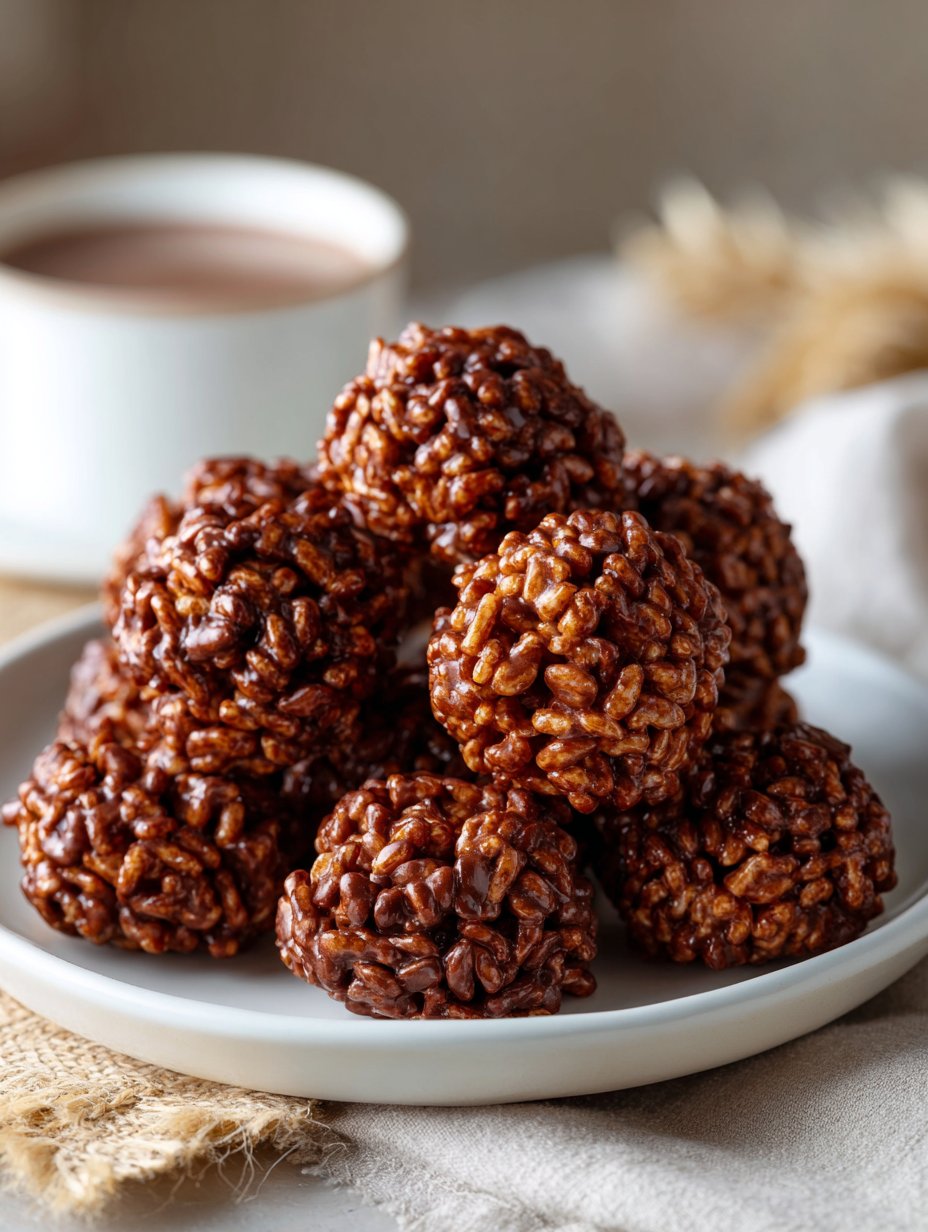
- Once you can handle it, grab chunks and roll into balls — ping pong size is what I aim for, but nobody’s keeping score. If you want to fancy it up, roll the balls in sprinkles or nuts or whatever’s in the cupboard.
- Pop them on a baking sheet lined with parchment (or foil if you’re out, who cares) and stick in the fridge until firm. Half an hour’s usually enough.
Notes from Too Many Late-Night Batches
- If the mixture’s super sticky, wetting your hands helps. Or just embrace the mess, honestly.
- Don’t skimp on cooling time; once tried rushing and ended up with chocolate smears all over the fridge door (oops).
- They hold together better with a bit more peanut butter, but then they taste more like fudge. Not a bad thing though.
- If you use marshmallows, melt them with the butter. Otherwise, you’ll be chasing little blobs around the pan.
What I’ve Tried (and What Flopped)
- Added a splash of vanilla once — lovely!
- Used white chocolate instead of milk — not my favorite, a bit too sweet
- Tried with almond butter — works fine, different vibe, kinda fancy
- Tossed in chili flakes on a dare — regretted that (but my brother liked it, go figure)
Got the Right Gear? (Or Not, No Worries)
- Large saucepan
- Mixing spoon (a wooden one is nice, but I’ve used a soup ladle in a pinch)
- Baking sheet or plate for chilling the balls
- Parchment or just foil — one time I even used a silicone mat, worked a treat
If you don’t have a proper saucepan, I’ve done this in the microwave in a glass bowl. Just melt in 30-second bursts, stirring in between.
How to Store (Assuming They Survive That Long)
Technically, you can keep these in an airtight container in the fridge for a week. But, honestly, in my house they never last more than a day; they seem to disappear, possibly due to snacky teenagers. If you hide them at the back under a bag of kale, your odds improve.
When and How I Serve These
We bring these out for movie nights, birthdays, and sometimes just because it’s raining and we need cheering up. My personal favorite is sneaking one with a cup of tea after everyone’s gone to bed — shhh. Oh, and at Christmas, we stack them up like a wonky chocolate pyramid (festive, if slightly lopsided).
Lessons Learned (The Hard Way)
- Don’t use old Rice Krispies — they get weirdly chewy. Fresh or nothing!
- Rushing the cooling? Big mistake. The balls don’t hold, and cleanup’s a nightmare.
- Don’t double the batch unless you’ve got a huge mixing bowl; my kitchen still bears the scars.
FAQ — Because Friends Really Do Ask
Can I freeze these? I mean, you can, but the texture gets odd. They’re better fresh, or just chilled.
Is there a way to make these vegan? Yep! Use vegan chocolate and swap the honey for maple syrup or agave. I actually like the taste with maple.
Can the kids help? Absolutely, though prepare for sticky faces and a sugar rush; it’s part of the fun.
I’m out of peanut butter — what now? Use any nut or seed butter. Or skip it and add a bit more chocolate and butter, though they’ll be less fudgy.
Do I need to use parchment? Not really — foil or a greased plate will do. Or just let them set in mini cupcake cases (looks cute for parties!).
By the way, if you’re looking for another no-bake treat, I love this No Bake Chocolate Peanut Butter Bars recipe. Also, if you’re curious about the best chocolate brands for baking, Bon Appétit’s chocolate guide is worth a read (the taste tests are wild).
So, there you have it — my rambling, slightly imperfect guide to Chocolate Rice Krispie Balls. Let me know if you try them (and if you’ve managed to keep them around for more than twenty-four hours, you’re a better person than me).
Ingredients
- 2 cups Rice Krispies cereal
- 1 cup semi-sweet chocolate chips
- 1/2 cup creamy peanut butter
- 1/4 cup unsalted butter
- 1 cup powdered sugar
- 1 teaspoon vanilla extract
- 1/4 teaspoon salt
- 1 tablespoon coconut oil (optional, for smoother chocolate coating)
Instructions
-
1In a large mixing bowl, combine the Rice Krispies cereal and powdered sugar.
-
2In a small saucepan over low heat, melt the unsalted butter and peanut butter together, stirring until smooth. Remove from heat and stir in vanilla extract and salt.
-
3Pour the peanut butter mixture over the cereal mixture and mix until well combined.
-
4Shape the mixture into 1-inch balls and place them on a parchment-lined baking sheet. Chill in the refrigerator for 15 minutes.
-
5In a microwave-safe bowl, melt the chocolate chips with coconut oil (if using) in 30-second intervals, stirring until smooth.
-
6Dip each chilled ball into the melted chocolate, coating evenly. Place back on the baking sheet and refrigerate until the chocolate is set.
Approximate Information for One Serving
Nutrition Disclaimers
Number of total servings shown is approximate. Actual number of servings will depend on your preferred portion sizes.
Nutritional values shown are general guidelines and reflect information for 1 serving using the ingredients listed, not including any optional ingredients. Actual macros may vary slightly depending on specific brands and types of ingredients used.
To determine the weight of one serving, prepare the recipe as instructed. Weigh the finished recipe, then divide the weight of the finished recipe (not including the weight of the container the food is in) by the desired number of servings. Result will be the weight of one serving.
Did you make this recipe?
Please consider Pinning it!!


