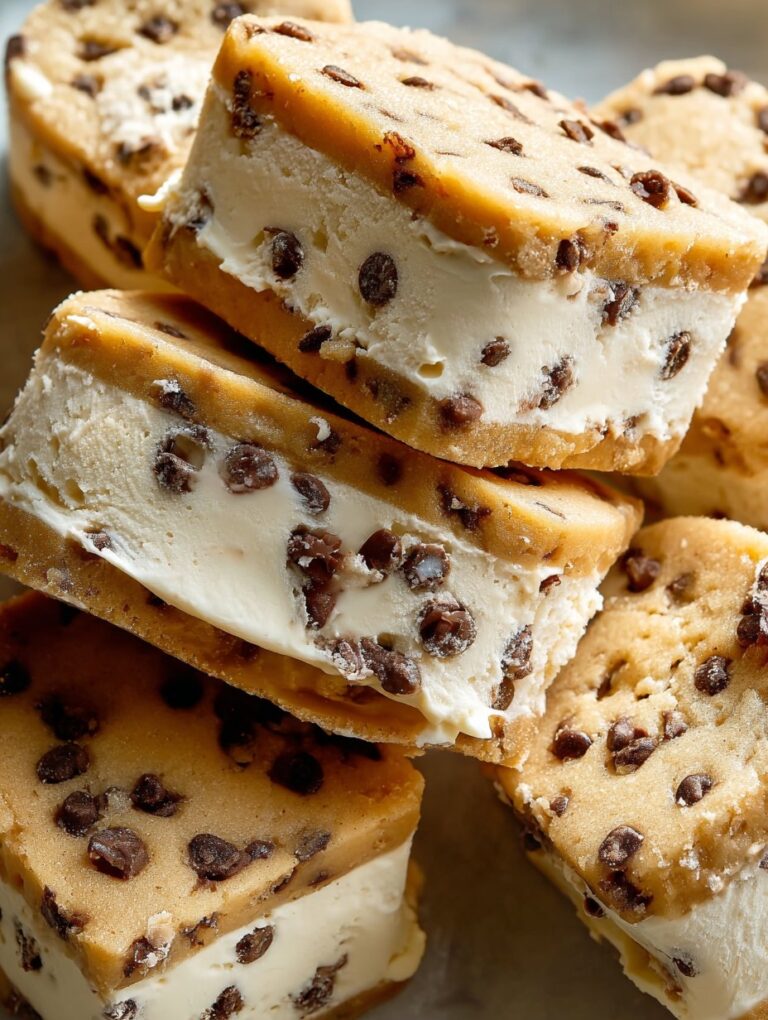
Let Me Tell You About These Cookie Dough Ice Cream Sandwiches
So, not to brag, but Cookie Dough Ice Cream Sandwiches are one of those “did I really just make this at home?” treats. I remember the first summer I tried them—my cousin dared me to make something “as good as the ones at the boardwalk.” Challenge accepted, and, well, let’s just say my kitchen looked like a cookie dough tornado hit it. But nobody was complaining once the sandwiches came out. I’ve made these for birthdays, break-ups (don’t ask), and honestly just because it’s Wednesday and that seems like reason enough. If you’re after a treat that makes you feel like a kid and an impressive home baker all at once, you’re in the right place.
Why You’ll Love These (or At Least Tolerate Them)
I make these when I want to impress my friends, or honestly, when I want to eat cookie dough without anyone judging me. My family goes bonkers for them, and it’s basically the only way my brother will eat ice cream (don’t even ask him about cake). Plus, you don’t have to turn on the oven, which is crucial in July when my kitchen gets hotter than a bushfire. The hardest part is waiting for them to freeze—every single time, I try to cut corners and regret it, but do I learn? Not always. Oh, and if you’re worried about the raw flour thing—don’t. I’ve got you covered.
Stuff You’ll Need (And a Few Swaps That Work Fine)
- 1 cup (225g) unsalted butter, softened (honestly, salted works too, just skip the extra salt)
- 1 cup brown sugar, packed (sometimes I do half white if I’m low, still tasty)
- 1/4 cup granulated sugar
- 2 tbsp milk (I use oat milk sometimes, nobody notices)
- 2 tsp vanilla extract (my gran swears by the cheap stuff, and so do I)
- 2 cups all-purpose flour, heat-treated* (more on that in the notes)
- 1/2 tsp salt (skip if your butter is salted)
- 1 cup mini chocolate chips (jumbo ones just fall out, trust me)
- 1–1.5 quarts vanilla ice cream, slightly softened (or chocolate, or cookie dough, or whatever’s in your freezer)
*To heat-treat flour, just microwave it in a bowl for about 1 min (stir halfway)—just so it doesn’t get you in trouble. You can check out King Arthur’s guide if you want more science than I usually manage.
How I Actually Put These Together (With Some Winging)
- Line a Pan: Grab an 8×8-inch pan (or whatever square-ish dish you have—I’ve used a lasagna pan in a pinch), line it with parchment so you can lift stuff out later. Don’t skip this or you’ll regret it later.
- Mix the Dough: Cream your butter and both sugars together, either with a mixer or a wooden spoon if you’re feeling old school (and strong). Add milk and vanilla, keep mixing till it’s smooth(ish). Now dump in your heat-treated flour and salt. It’ll look weird at first but just keep going—it comes together. Then fold in those chocolate chips. This is where I usually sneak a bite, because why not?
- Divide and Press: Split your dough in half. Press half into the bottom of your pan. I use my hands, but you can try using the back of a spoon if you don’t mind getting messy. Pop it in the freezer for 10–15 mins, just so it firms up.
- Add the Ice Cream: Let your ice cream sit out for 5–10 mins so it’s spreadable but not melting all over the place. Slather it onto the chilled dough layer. Make it as thick as you want (I aim for about an inch, but sometimes it’s more like “however much ice cream is left”). Smooth it out—doesn’t have to be perfect. Put it back in the freezer for 15 mins, or longer if you get distracted like I do.
- Top it Off: Press the second half of the cookie dough on top. This part can be fiddly—break it into pieces, sort of puzzle them together, then smush it into a layer. Don’t worry if it looks Frankensteinish; once it’s frozen, nobody cares.
- Freeze It All: Cover and freeze for at least 3 hours, or overnight if you can stand it. The longer, the better—if you rush it, the sandwiches fall apart. (Ask me how I know.)
- Slice and Serve: Lift it out using the parchment, cut into squares or rectangles or weird triangles—the shape doesn’t matter, the taste does.
Actually, sometimes I get impatient and try to slice them before they’re frozen solid, and it’s always a mess. Don’t be me. Or do, it’s still delicious.
Notes I’ve Learned the Hard Way
- If your dough is too sticky, chill it a few minutes or dust your hands with flour (don’t go overboard or it gets dry).
- Your ice cream doesn’t have to be perfect—if it’s a bit streaky or uneven, just call it “rustic.”
- Heat-treating the flour really does matter. I used to skip it, but then my friend sent me this terrifying CDC link. Now I’m on board.
Variations—What Worked and What… Didn’t
- Swap the Ice Cream: Coffee ice cream is wild here—my husband calls it “dangerously good.” Strawberry was meh, if I’m honest. Maybe it’s just me.
- Mix-Ins: Sometimes I add chopped pretzels or toffee bits to the dough. Not traditional, but really tasty.
- Gluten-Free: I tried it once with a 1-for-1 gluten-free flour blend—actually worked pretty well, though the dough was a bit crumblier. On second thought, maybe add a dash more milk if you go this route.
What You Need (But Don’t Panic If You Don’t Have It)
- 8×8-inch pan (I’ve used a loaf pan. It just makes thicker sandwiches, which isn’t exactly a hardship.)
- Mixing bowl
- Hand mixer or good old-fashioned spoon
- Spatula (or, you know, a butter knife… been there)
- Parchment paper—if you don’t have it, foil works, though it’s a bit stickier
How to Store Them (But Good Luck Making Them Last)
Wrap the sandwiches in cling film or stash them in an airtight container in the freezer. They’re technically good for a week or more, but honestly, in my house, they barely survive 24 hours. If you want to prep ahead for a party, you can totally make them the night before.
How I Like to Serve These (And You Might, Too)
My favourite thing is to serve these straight out of the freezer with a mug of strong coffee (dunks are encouraged). Sometimes, when the whole family’s over, we set up a toppings bar—sprinkles, mini M&Ms, even a drizzle of caramel sauce. It gets a bit chaotic, but that’s half the fun.
Things I Learned the Hard Way (AKA Pro Tips)
- Freeze longer than you think you should. I once tried to rush slicing and ended up with gooey, floppy sandwiches. Still edible, but messy as heck.
- Use mini chips, not regular. The big ones make the dough lumpy—trust me, I spent 15 minutes trying to press them flat once. Never again.
- Don’t over-mix the dough or it gets tough, which nobody wants—especially in something meant to be soft and chewy.
Real Questions I’ve Gotten (And My Real Answers!)
- Do I have to use vanilla ice cream? Nope! Try cookie dough, mint chip—whatever you love. I even used leftover rocky road once for a mate’s birthday, and it basically disappeared in five minutes flat.
- Can I use store-bought cookie dough? Sure, in a pinch, but make sure it’s the kind that’s safe to eat raw (it’ll say so on the package). Flavour’s a bit different, but it works. Homemade is just more fun, I reckon.
- How do I heat-treat flour again? Stick it in the microwave for about a minute, stirring halfway, or bake it at 350°F for 5–7 mins. Let it cool before you mix it in; otherwise, you get weird melty butter (been there, not fun).
- Can I double the recipe? Definitely! Use a 9×13-inch pan and just watch the freezing time—it’ll need a bit longer, obviously.
- What if I don’t have parchment paper? Foil works in a pinch, or even plastic wrap. Just don’t skip lining the pan, or you’ll spend ages prying sticky dough from the corners.
Oh, side note—once, I tried making these with peanut butter chips instead of chocolate chips. Let’s just say, it was a bit too much even for me. But hey, never hurts to experiment, right?
If you want proper step-by-step pictures, check out Sally’s Baking Addiction—her instructions are ace, and way neater than mine. But I think the mess is half the charm.
Ingredients
- 1 cup all-purpose flour
- 1/2 cup unsalted butter, softened
- 1/2 cup brown sugar
- 1/4 cup granulated sugar
- 1 teaspoon vanilla extract
- 1 cup mini chocolate chips
- 2 tablespoons milk
- 1.5 pints vanilla ice cream, slightly softened
Instructions
-
1Preheat the oven to 350°F (175°C) and line a baking sheet with parchment paper.
-
2In a bowl, cream together the softened butter, brown sugar, and granulated sugar until light and fluffy.
-
3Mix in the vanilla extract and milk, then gradually add the flour until combined. Stir in the mini chocolate chips.
-
4Scoop tablespoon-sized portions of dough onto the prepared baking sheet, flatten slightly, and bake for 10-12 minutes until golden. Let cool completely.
-
5Once cookies are cool, place a scoop of vanilla ice cream between two cookies and gently press to form a sandwich.
-
6Wrap sandwiches in plastic wrap and freeze for at least 1 hour before serving.
Approximate Information for One Serving
Nutrition Disclaimers
Number of total servings shown is approximate. Actual number of servings will depend on your preferred portion sizes.
Nutritional values shown are general guidelines and reflect information for 1 serving using the ingredients listed, not including any optional ingredients. Actual macros may vary slightly depending on specific brands and types of ingredients used.
To determine the weight of one serving, prepare the recipe as instructed. Weigh the finished recipe, then divide the weight of the finished recipe (not including the weight of the container the food is in) by the desired number of servings. Result will be the weight of one serving.
Did you make this recipe?
Please consider Pinning it!!


