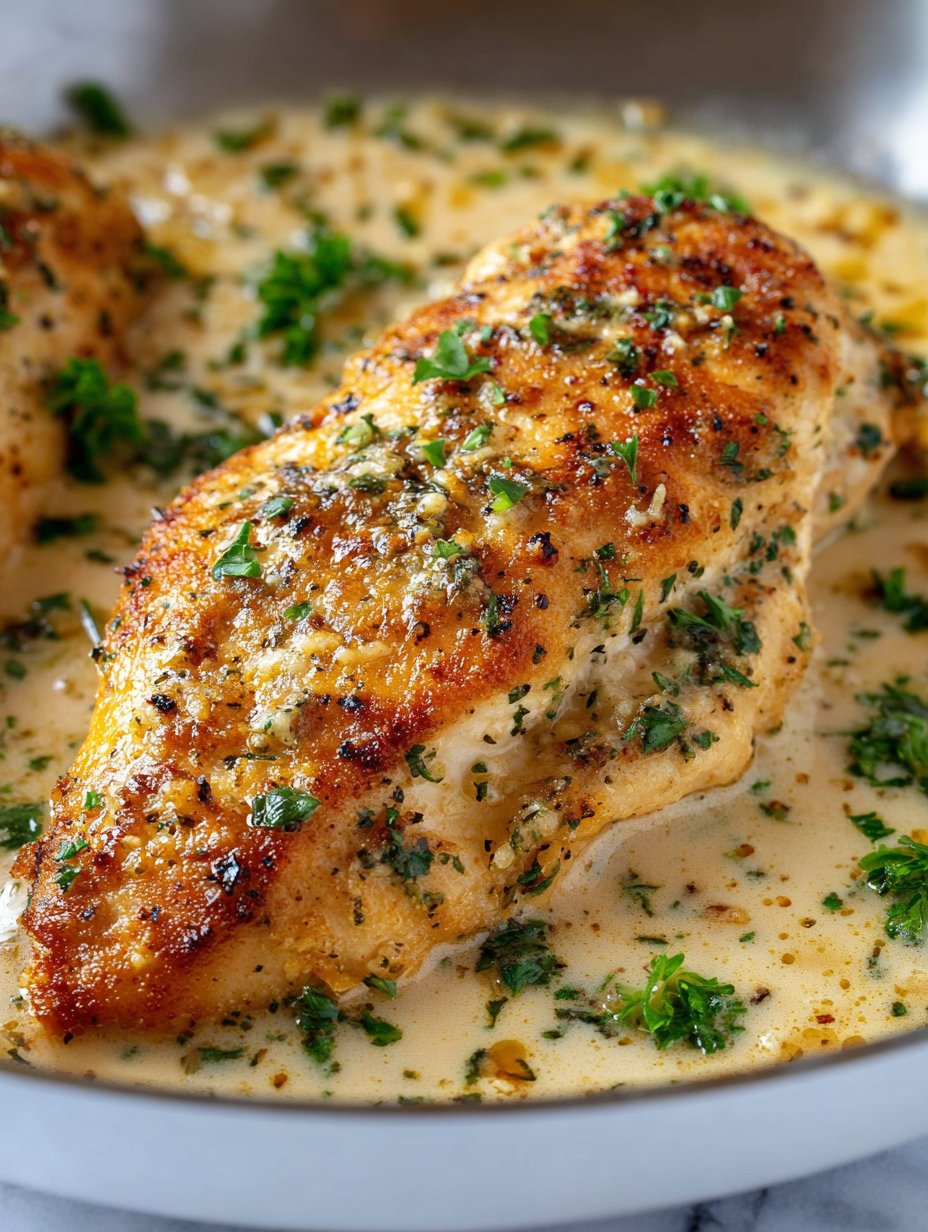
Alright, so let me just say: Garlic Parmesan Chicken has officially become my emergency dinner when the world’s spinning a bit too fast (like last Wednesday, when I realized I had exactly 41 minutes to get something on the table before the kids started foraging for snacks). It’s warm, cheesy, garlicky… basically the culinary hug I need after a bonkers day. The first time I made this, I accidentally doubled the garlic—my husband claimed it was the best thing I’d ever cooked, though he did keep his distance for the rest of the night. Honestly, this recipe is forgiving, and it feels like you’re cheating because it’s so simple for how tasty it turns out.
Why You’ll Love Making This (Even When You Don’t Want To Cook)
I reach for this Garlic Parmesan Chicken when I want something homemade but can’t face a pile of chopping. My family goes a bit nuts for it, especially if I serve it with pasta or just a hunk of bread to mop up the sauce. Sometimes, I’ll admit, I use pre-shredded cheese (I know, I know, but who’s got time to grate cheese after a long day?). Oh, and I used to dread coating chicken because I could never get the breadcrumb layer to stick—turns out, a tiny drizzle of olive oil is the trick. Plus, you get to dump everything in one pan and let the oven do its thing, which is just… bliss, really.
What You’ll Need (But Seriously, Improvise If You Have To)
- 4 boneless, skinless chicken breasts (thighs work too, or even chicken tenders if that’s what’s lurking in the freezer)
- 3/4 cup grated Parmesan cheese (fresh is great; my grandmother swore by the green can, but honestly, no judgment)
- 1/2 cup breadcrumbs (Panko for extra crunch, but regular work fine—sometimes I even toast a slice of bread and blitz it in the food processor)
- 3-4 garlic cloves, minced (or more if you’re feeling bold; I once used the jarred stuff and it was totally fine)
- 2 tablespoons olive oil (sometimes I use melted butter if I’m feeling fancy)
- 1 teaspoon dried Italian seasoning (oregano on its own is fine, or throw in some thyme if you like)
- Salt and black pepper, just to taste (I never measure, just give it a sprinkle)
- Optional: a handful of chopped fresh parsley for that chef-y flourish
Let’s Get Cooking! (Don’t Stress, It All Comes Together)
- Preheat your oven to 400°F (200°C). Grab a baking dish—if you only have a sheet pan, that’ll do.
- Pat the chicken dry (this helps things stick better, but if you forget, it’s not the end of the world).
- In a shallow bowl or a biggish plate, mix together the Parmesan, breadcrumbs, garlic, Italian seasoning, salt, and pepper.
- Brush (or drizzle) the chicken with olive oil on both sides. This is where I usually sneak a tiny taste of the breadcrumb mix—I’m weak, I know.
- Press each chicken piece into the cheesy breadcrumb mixture. Don’t worry if it looks a bit patchy; honestly, it always does at this point.
- Lay the chicken in your dish. Sprinkle any leftover crumbs on top if you want extra crunch.
- Bake for 22-28 minutes, depending on thickness. At around 20 minutes, I check if it’s golden on top (or just poke it to see if the juices are clear—super scientific, right?)
- If you want an extra-golden top, flip on the broiler for the last 2 minutes, but watch it like a hawk—I’ve learned the hard way that it goes form golden to burnt faster than you think.
- Let it sit for 5 minutes before serving. Or just dig in and risk burning your tongue (don’t say I didn’t warn you).
Things I’ve Learned (So You Don’t Have To)
- If your breadcrumbs seem dry, a little extra olive oil really does fix everything.
- Using chicken thighs makes it juicier. I know people say breasts are healthier, but sometimes you just want that flavor, you know?
- Don’t skip the resting—actually, I’ve found it works better if I let it sit. Makes slicing neater, too.
Things I’ve Tried (Good and… Well, Not So Good)
- Adding lemon zest to the coating—actually, I think it made the dish pop.
- Swapping out the Parmesan for pecorino—worked, but was a tad salty.
- Tried doing a gluten-free version with crushed rice cakes—once. Let’s just say, it’s not my finest hour.
Do You Need Fancy Gear? Not Really
I always use a big shallow bowl for dredging, but if I can’t find it (where do all my bowls go?), a large Tupperware lid works too. If you don’t have a brush for the oil, just use your hands or a spoon. And if your baking dish is occupied (hello, roasting veg), a rimmed cookie sheet is just dandy.

How to Store Garlic Parmesan Chicken (If There’s Any Left!)
Just pop leftovers in an airtight container in the fridge; they’ll keep for 2-3 days. I think this tastes even better the next day, if you reheat it in the oven so it crisps up again. But honestly, in my house it never lasts more than a day—someone always nabs the last piece for a midnight snack. You can even freeze single portions if you want, though sometimes the crust gets a bit soft after thawing.
How I Love Serving This (And Other Ideas)
I usually pile these on top of buttery noodles (or even homemade pasta if I’m feeling energetic), but sometimes I just do a big salad and call it dinner. My cousin insists on mashed potatoes—she calls it “proper comfort food”—and I have to admit, she’s not wrong. If you want a little more green, some simple roasted broccoli is never a bad idea. Oh! And my son likes to dunk his in ranch dressing, which, honestly, is pretty tasty.
Things I Wish I’d Known (Pro Tips The Hard Way)
- I once tried skipping the preheating to save time and regretted it—the chicken cooked unevenly and the crust went soggy. Just wait the extra five minutes.
- Don’t crowd the pan. I sometimes try to squeeze in an extra piece, but then nothing browns right. Give them a bit of breathing room.
- Actually, I find it works better if I use parchment paper—makes cleanup less of a faff, too.
Questions I’ve Actually Gotten About This Recipe
- Can I use chicken tenders instead of breasts?
- Absolutely! Just check them a bit earlier—sometimes they’re done in 15 minutes.
- Can I make this dairy-free?
- Well, kind of; you can use nutritional yeast instead of Parmesan. It’s not quite the same, but it’s still tasty.
- Help! I don’t have breadcrumbs!
- No worries—I’ve crumbled up crackers, used crushed cornflakes, or even just a bit more cheese in a pinch. It’s pretty flexible.
- Is this spicy?
- Not really. If you want a kick, you could add a pinch of chili flakes to the coating. I do that sometimes when I want to surprise myself.
- Can I make this ahead?
- You can coat the chicken a few hours in advance and refrigerate it. But don’t bake it until you’re ready, or you risk a soggy crust (learned that the hard way!).
Oh, and if you’re the type who likes to watch someone else do it first, I honestly love the step-by-step videos over at Bon Appétit—their test kitchen folks are delightfully real. Anyway, hope you enjoy this Garlic Parmesan Chicken as much as I do—let me know if you discover any clever tweaks!
Ingredients
- 4 boneless, skinless chicken breasts
- 3/4 cup grated Parmesan cheese
- 1/2 cup breadcrumbs
- 3 cloves garlic, minced
- 2 tablespoons fresh parsley, chopped
- 1 teaspoon dried Italian seasoning
- 1/2 teaspoon salt
- 1/2 teaspoon black pepper
- 2 tablespoons olive oil
Instructions
-
1Preheat the oven to 400°F (200°C). Lightly grease a baking dish with olive oil.
-
2In a shallow bowl, combine the Parmesan cheese, breadcrumbs, minced garlic, Italian seasoning, salt, black pepper, and chopped parsley.
-
3Brush both sides of the chicken breasts with olive oil.
-
4Dredge each chicken breast in the Parmesan mixture, pressing lightly to coat both sides evenly.
-
5Place the coated chicken breasts in the prepared baking dish. Bake for 25 minutes, or until the chicken is cooked through and the coating is golden brown.
-
6Remove from the oven and let rest for a few minutes before serving. Garnish with extra parsley if desired.
Approximate Information for One Serving
Nutrition Disclaimers
Number of total servings shown is approximate. Actual number of servings will depend on your preferred portion sizes.
Nutritional values shown are general guidelines and reflect information for 1 serving using the ingredients listed, not including any optional ingredients. Actual macros may vary slightly depending on specific brands and types of ingredients used.
To determine the weight of one serving, prepare the recipe as instructed. Weigh the finished recipe, then divide the weight of the finished recipe (not including the weight of the container the food is in) by the desired number of servings. Result will be the weight of one serving.
Did you make this recipe?
Please consider Pinning it!!


