Let Me Tell You About My Hibachi Night (And Why My Dog Always Shows Up)
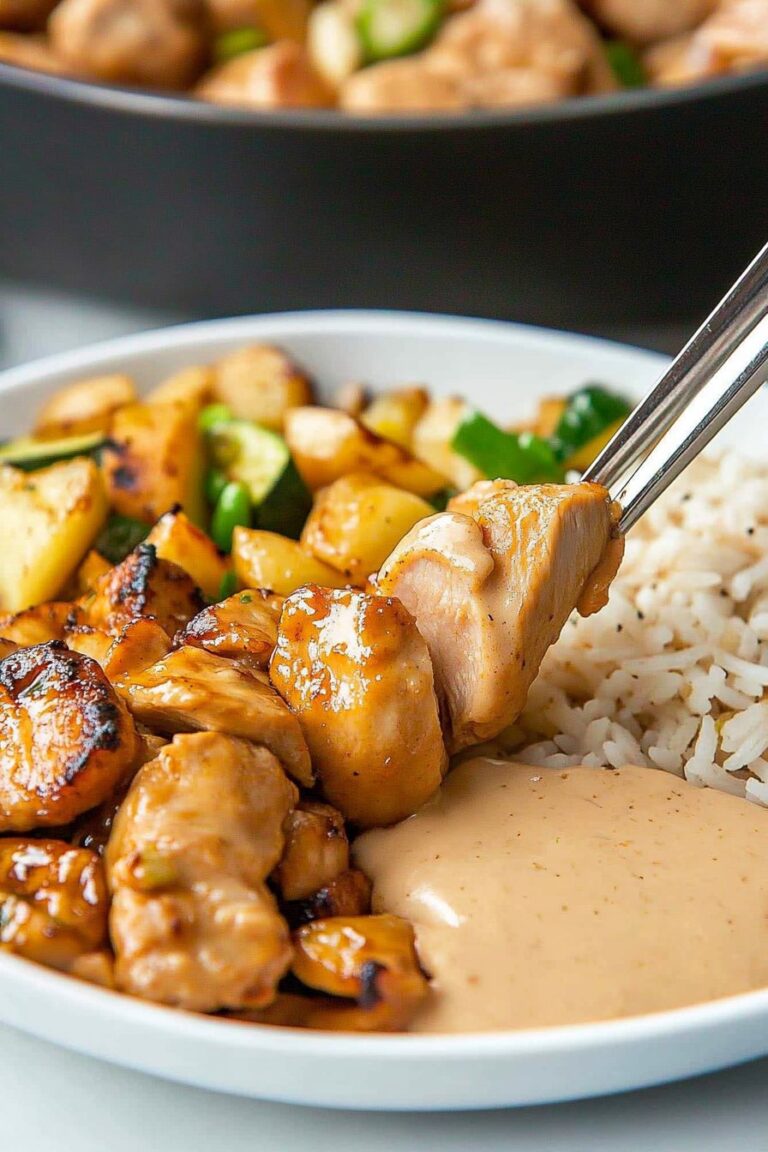
So, Hibachi Chicken with Fried Rice and Vegetables. If you’ve ever sat around one of those sizzling grills at a Japanese steakhouse, you know the feeling—half excitement, half waiting for the chef to toss a shrimp into your open mouth (I never catch it, by the way). I started making this at home after my youngest declared that “restaurant chicken tastes like fun,” which, honestly, is not the worst review I’ve ever gotten. The first time I tried it, I set off the smoke alarm. Twice. Now, even my dog knows to wait by the kitchen door whenever the soy sauce hits the pan. That smell, man. It just floats through the house and makes everyone hungry—even the neighbor’s cat sometimes peeks in. Anyway, if you’re up for a bit of kitchen chaos, let’s get going!
Why This Recipe Is Practically a Family Tradition (Even If It Isn’t)
I make this whenever someone in the house starts craving takeout but we’re trying to save a bit of cash (or just can’t be bothered to wait for delivery). My family goes nuts for the crispy bits of chicken and veggies. Honestly, I mostly love it because I can sneak extra veggies in and no one complains. Sometimes it feels like a lot of steps, but actually, I find it comes together faster than you’d think if you just embrace the mess (and accept that rice will end up in odd corners of your stovetop). Plus, there’s something fun about tossing everything together in a big pan—even if you miss and drop a carrot or two, nobody minds.
Alright, Here’s What You’ll Need (Substitutions Welcome)
- Chicken breast (about 500g or a pound). I sometimes use chicken thighs—way juicier, but a little more fiddly to chop. If you’re in a hurry, pre-chopped chicken works fine.
- Cooked rice (ideally cold, like 3 cups). I use leftover jasmine rice, though my grandmother always insisted on plain old long grain. Honestly, any day-old rice will do.
- Mixed veggies: My go-to is carrots, zucchini, onions, and broccoli. But I’ve used frozen stir-fry mixes when I’m out of fresh stuff. Even snap peas work—no rules!
- Soy sauce: About 4 tablespoons. I’ve swapped in tamari or coconut aminos for friends who can’t do gluten. It’s all good.
- Butter: 2-3 tablespoons. Salted or unsalted, I don’t stress it. Margarine if you have to (but it’s not the same…just saying).
- Garlic: 2 cloves, minced. Garlic powder in a pinch. I sometimes double it because…garlic!
- Eggs: 2 large. I’ve made it without, but the egg makes the rice richer.
- Oil: Vegetable or canola. I once used olive oil and it was… fine. Not my fave, but it works.
- Salt and pepper to taste. White pepper if you want to be fancy.
- Sesame seeds and scallions for garnish (optional, but trust me, it looks way prettier with them).
How I Actually Make This (With a Few Sidesteps)
- Prep everything first. Seriously, chop all your veggies and chicken before you start. The first time I didn’t, and my onions went from golden to, well, black while I was still dicing the carrots.
- Fire up your pan. I use a big nonstick skillet—if you have a griddle or wok, even better! Heat a splash of oil on medium-high. Don’t wait too long, but don’t rush it, either. When it shimmers (but isn’t smoking), you’re ready.
- Chicken time! Toss in the chicken cubes, season with salt and pepper, and let them sizzle. I usually don’t move them for a couple minutes so you get those golden brown edges. If you crowd the pan, they’ll steam instead of sear, so work in batches if you need.
- Add garlic and butter. Right before the chicken’s done, in goes the garlic and butter. This is where I usually sneak a bite (chef’s privilege). Give it a stir until it smells like deliciousness.
- Push the chicken aside (or take it out) and cook veggies. I add a bit more oil if things look dry. Chuck in your veggies. If you want them softer, cover for a minute or so—if you like crispier veg, just toss and fry for 3-5 minutes.
- Add the rice and eggs. Now, shove everything to one side (or take it all out, if you want to be proper). Add another splash of oil, dump in the rice, and break up the clumps. Make a little well in the center—crack in your eggs, scramble them up, and then mix everything together. Don’t worry if it looks a bit weird at this stage—it always does!
- Season and finish. Pour in the soy sauce and mix, letting the rice soak it up. Taste for salt/pepper. If you want to be extra, splash in a dash of sesame oil right at the end (I sometimes forget, but when I remember, wow).
- Serve with garnishes. Scallions, sesame seeds, even a squirt of sriracha if you like spice. Or just dig in straight from the pan. No judgment.
Some Notes (Aka: Things I’ve Learned the Hard Way)
- Cold rice is best, but freshly cooked can work if you spread it out to cool for like 10 minutes. Otherwise it gets gummy. Don’t ask me why, it just does.
- If you use too much soy sauce, everything goes brown—so start light and add more if you need.
- Washing up is a pain, but soaking the pan right away helps (I learned this after one sad, sticky mess).
Variations I’ve Tried (And One I’ll Never Do Again)
- Shrimp instead of chicken—super quick and tasty, but don’t overcook or it gets rubbery.
- Cauliflower rice for a low-carb twist. Tastes pretty good, though not exactly the same. My kids didn’t fall for it, but I liked it.
- Tofu for a veggie version—cube it and sear until golden. Actually, tofu sticks if you don’t press it first, so don’t skip that. Trust me.
- I once tried adding pineapple—thought it’d be like sweet and sour chicken. It was, uh, not my best idea. Wouldn’t do it again.
What You’ll Need in the Kitchen (And What to Do If You Don’t Have It)
- Big skillet, wok, or griddle. A regular frying pan is fine—just use what you’ve got.
- Good spatula. If you’ve only got a wooden spoon, that’ll work. I’ve even used tongs (awkward, but possible).
- Chopping board and sharp knife. Or, honestly, kitchen scissors for the chicken if you’re in a rush—I won’t tell.

Storing the Leftovers (If There Are Any)
Pop leftovers in an airtight container and keep in the fridge. They’ll last about 2-3 days—though honestly, in my house it never lasts more than a day because everyone raids the fridge for late night snacks. I think this tastes better the next day, actually (maybe because I don’t have to cook it again?). If you want to freeze it, you can—just be aware the veggies get a bit mushy after defrosting.
How We Serve This (And My Odd Habit)
This is pretty much a meal-in-a-bowl, but if I’m trying to be a bit fancy (rare, but it happens), I’ll serve it with a simple cucumber salad or some miso soup on the side. My personal tradition? I sprinkle extra sesame seeds and eat with chopsticks, even if everyone else grabs a fork. Makes it feel special, somehow.
What I Wish I’d Known the First Time (Pro Tips Learned the Hard Way)
- Don’t try to cook everything at once if your pan is small. I once rushed this step and ended up with soggy chicken. Not worth it!
- Let the chicken sit before flipping—otherwise you’ll just steam it instead of getting that nice golden crust.
- Actually, I find it works better if you add the eggs after the rice, not before. Otherwise they disappear into the mix and you lose that classic fried rice look.
FAQ (Real Questions from Friends and Family… and Me)
- Do I have to use cold rice? You don’t have to, but it’s way less sticky if you do. If you forgot to cook the rice the night before (happens to me all the time), spread it on a baking sheet and stick it in the freezer for 20 minutes. Works pretty well!
- Can I add other veggies? Oh, totally. I’ve tried just about everything—bell peppers, mushrooms, even some spinach (it wilts fast; add at the end).
- Is there a way to make it spicy? Yep—just toss in some chili flakes or a spoonful of sambal oelek. Or, do what my brother does and drown it in sriracha. (Here’s a hot sauce taste test if you want to experiment.)
- What if I don’t have a wok? No problem—a big skillet works fine. Actually, sometimes it’s easier because everything stays put. But if you want wok tips, these folks explain it better than I can.
- Is this gluten free? Only if you use tamari or a gluten free soy sauce. Here’s a handy soy sauce guide for reference.
So that’s my not-so-polished, genuinely home-cook version of Hibachi Chicken with Fried Rice and Vegetables. If you give it a go, let me know how it turns out (unless you add pineapple—then maybe don’t tell me). And if you spill rice everywhere, welcome to the club!
Ingredients
- 1 lb boneless, skinless chicken breast, cut into bite-sized pieces
- 3 cups cooked white rice (preferably day-old)
- 2 tablespoons soy sauce
- 2 tablespoons vegetable oil, divided
- 1 tablespoon butter
- 1 medium onion, diced
- 1 cup zucchini, sliced
- 1 cup carrots, julienned
- 1 cup broccoli florets
- 2 large eggs, beaten
- 2 cloves garlic, minced
- Salt and pepper to taste
- 2 green onions, sliced (for garnish)
Instructions
-
1Heat 1 tablespoon of vegetable oil in a large skillet or hibachi grill over medium-high heat. Add the chicken pieces, season with salt and pepper, and cook until golden brown and cooked through, about 6-8 minutes. Remove chicken and set aside.
-
2In the same skillet, add the remaining oil and butter. Sauté the onion, zucchini, carrots, and broccoli for 5-7 minutes until vegetables are tender-crisp. Add the minced garlic and cook for 1 minute more.
-
3Push the vegetables to one side of the skillet. Pour the beaten eggs onto the empty side and scramble until just set.
-
4Add the cooked rice to the skillet. Drizzle with soy sauce and stir everything together, mixing the eggs and vegetables evenly into the rice.
-
5Return the cooked chicken to the skillet and toss to combine. Cook for an additional 2-3 minutes until everything is heated through. Adjust seasoning with salt and pepper if needed.
-
6Serve hot, garnished with sliced green onions.
Approximate Information for One Serving
Nutrition Disclaimers
Number of total servings shown is approximate. Actual number of servings will depend on your preferred portion sizes.
Nutritional values shown are general guidelines and reflect information for 1 serving using the ingredients listed, not including any optional ingredients. Actual macros may vary slightly depending on specific brands and types of ingredients used.
To determine the weight of one serving, prepare the recipe as instructed. Weigh the finished recipe, then divide the weight of the finished recipe (not including the weight of the container the food is in) by the desired number of servings. Result will be the weight of one serving.
Did you make this recipe?
Please consider Pinning it!!


