A Nutty Trip Down Memory Lane
Alright, so let me tell you—Homemade Nutter Butter Cookies are one of those things I whip up when I need a little nostalgia with my sugar fix. I remember making these with my cousin once, and we accidentally doubled the peanut butter (long story, don’t ask), but honestly, they came out so good we all pretended it was intentional. You know that feeling when you open a pack from the store and just can’t stop? These homemade ones are even better. And if you end up with a bit of peanut butter on your shirt? Consider it a badge of honor.
Why You’ll Love These (Or at Least, Why I Do)
I make this when I want something that tastes like childhood but with a little extra oomph. My family goes a bit bonkers for these because they’re sweet, salty, super peanut-buttery, and just the right level of crumbly. (If you’re not into peanut butter, well, might be time for a new favorite cookie. Kidding!) And—true story—the first time I tried making these, I ended up eating half the dough before it hit the oven. Not proud, but also, not sorry.
What You Need (And Some Handy Swaps)
- 1 cup creamy peanut butter (my grandma swore by Jif, but I’ve used store-brand plenty; as long as it’s not too oily, you’re good)
- 1/2 cup unsalted butter, softened (honestly, salted works too—just cut the extra salt)
- 1/2 cup granulated sugar
- 1/2 cup packed light brown sugar (dark brown is fine; gives a deeper flavor)
- 1 large egg
- 1 tsp vanilla extract (I sometimes splash in a little extra because, why not?)
- 1 1/2 cups all-purpose flour
- 3/4 tsp baking soda
- 1/2 tsp baking powder
- 1/4 tsp salt (skip if using salted butter)
- Filling: 1/2 cup peanut butter, 1/4 cup unsalted butter (softened), 1 cup powdered sugar, 1 tsp vanilla, pinch of salt if you like that sweet-salty kick
How to Make Homemade Nutter Butters (Let’s Get Messy!)
- Preheat your oven to 350°F (about 175°C). I always forget and end up waiting, so, you know, don’t be like me.
- Grab a big bowl and cream together peanut butter, butter, and both sugars. I use an electric mixer because I’m lazy (well, busy), but a wooden spoon works too if you’re feeling old-school. Mix until fluffy. This is where I sneak a taste. Quality control, you know?
- Toss in the egg and vanilla. Beat until combined.
- In another bowl (or just on top if you’re feeling rebellious), stir together flour, baking soda, baking powder, and salt. Add the dry stuff to the wet mix and blend just until it holds together—don’t overmix, or your cookies might go tough on you.
- Scoop out dough by the tablespoon and roll into balls. Here’s the fun bit: squish each ball into an oval shape (look, it doesn’t have to be perfect—mine never are). Place them on a lined baking sheet about 2 inches apart.
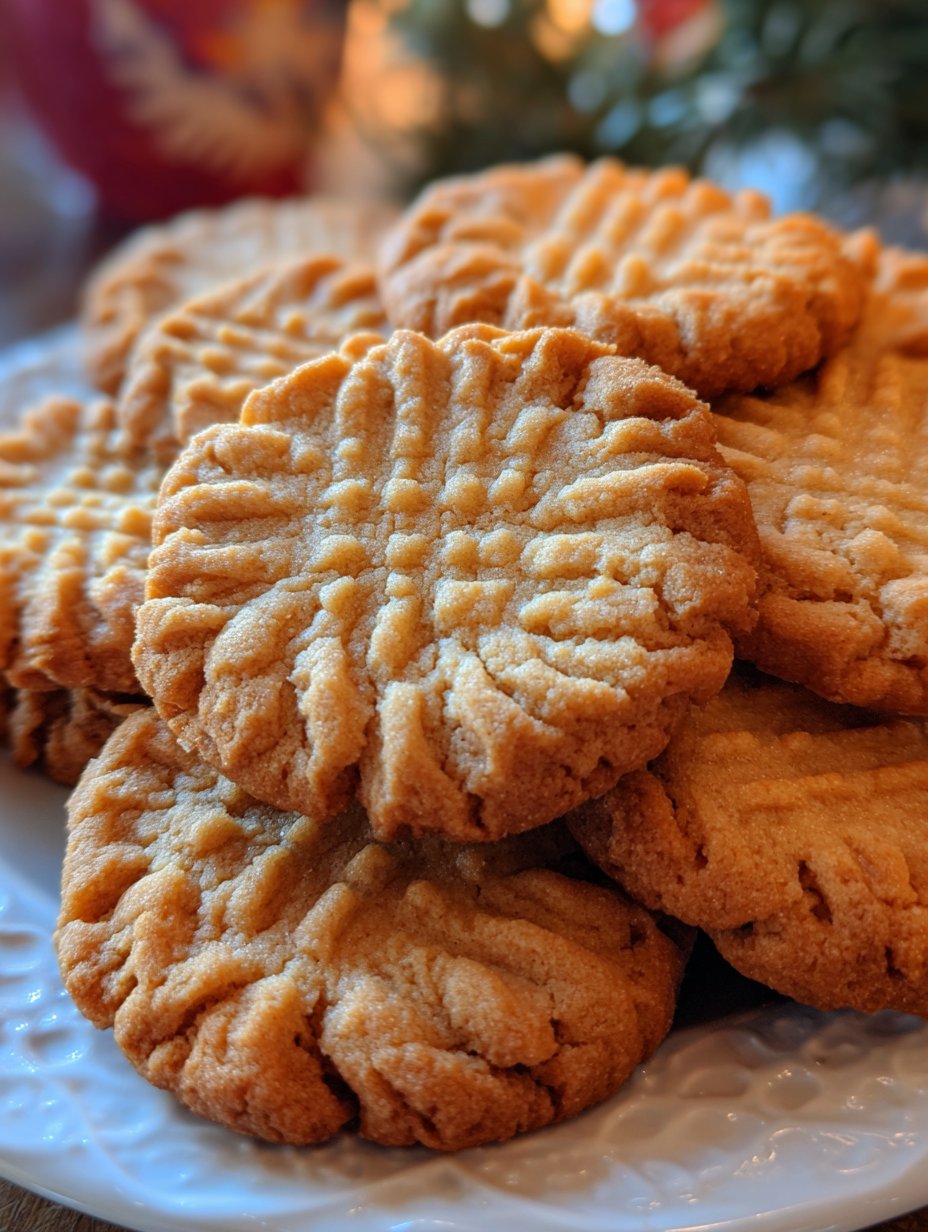
- Use a fork to make that classic criss-cross pattern (or not, if you like living on the edge). Sometimes mine stick to the fork, so I dip it in flour—problem solved.
- Bake 8–10 minutes. They’ll look a bit soft, but they firm up as they cool. Don’t panic if they look wobbly; that’s totally normal.
- Let cookies cool on the sheet for a few minutes, then transfer to a rack. Now for the filling: beat together peanut butter, butter, powdered sugar, and vanilla until smooth. If it’s too thick, a splash of milk helps.
- Once cookies are cool (I never wait long enough), spread a spoonful of filling between two cookies to make sandwiches. Voila! Homemade Nutter Butters that will impress, well, at least your pet if not the whole family.
Stuff I Learned (Usually the Hard Way)
- Don’t skip letting the cookies cool—otherwise, the filling melts everywhere. (I say this as someone who never waits, but should.)
- If the dough is sticky, pop it in the fridge for 15 minutes. Actually, I find it works better if you chill it a bit longer, like 30 mins, especially in summer.
- You can make these gluten-free by using a 1-to-1 GF flour, but they turn out a little more crumbly. Still tasty though!
Variations I’ve Actually Tried (Some Good, Some Not)
- Chunky peanut butter instead of creamy—adds fun crunch! But sometimes the cookies fall apart, so be gentle.
- Drizzling melted chocolate over the top. This is so good, but also, messy. Like, next-level messy.
- Once I tried almond butter—honestly, not my favorite, but maybe that’s just me. If you do, let me know if you like it more!
Equipment (And What to Do If You Don’t Have It)
- Mixer (hand or stand, but I’ve done it with just a wooden spoon when the power went out, so it’s possible, just a bit more of a workout!)
- Baking sheets
- Parchment paper or silicone mats (if you don’t have these, butter the tray—just be ready to scrub a bit afterward)
- Cooling rack (or just a clean dish towel on the counter, which is what my mum always did)

How to Store Them (If They Last…)
Technically, these stay fresh in an airtight container for 3–4 days at room temp. In the fridge, maybe a week. But honestly, in my house, they never last more than a day! You can freeze the assembled cookies for up to a month, but on second thought, I think they taste best fresh out of the oven (or, well, slightly cooled).
How I Like to Serve These (And Maybe You Will Too)
We love dunking them in cold milk—classic, right? Or, if I’m feeling fancy, I’ll crumble one over a bowl of vanilla ice cream. Sometimes I put a couple in the lunchbox as a surprise. My neighbor once sandwiched chocolate chips in the filling because, why not?
Lessons I’ve Learned (Usually the Hard Way, Again)
- I once tried rushing the cooling step and regretted it because the filling just slid right out. Oops.
- Don’t overbake—even if they look a bit underdone, they’ll set up as they cool.
- Actually, I find it works better if you use room-temp butter for the filling—cold butter just makes it lumpy.
FAQs (These Are Real Questions I’ve Gotten!)
- Can I use natural peanut butter?
- You can, but it makes the dough a bit oily and the cookies spread more. I’d stick with a no-stir type for best results. If you give it a go anyway, just watch the bake time.
- What if I don’t have a mixer?
- Arm power! Honestly, lots of elbow grease and a wooden spoon works fine; just takes longer, so maybe put on a good playlist. Or rope in a helper.
- Can I freeze the dough?
- Yep! Roll into balls, freeze on a tray, then stash in a bag. Bake straight from frozen—just add a minute or two to the oven time. Super handy for midnight snacks.
- Is there a way to make these vegan?
- There probably is (I’ve seen similar recipes online, like over at Minimalist Baker), but I haven’t tried it myself. If you do, shoot me a message!
- Where can I get a good vanilla extract?
- Honestly, I just grab mine at the supermarket, but if you want fancy stuff, King Arthur Baking does a great one. Pricey but worth it for special bakes.
By the way, did you know that peanuts aren’t actually nuts? They’re legumes! Found that out on a trivia night, and I still get weirdly smug about it. Anyway—happy baking, and may your cookies always come out golden, not burnt. If you have a not-so-pretty batch, just call them “rustic”—that’s what I do.
Ingredients
- 1 cup creamy peanut butter
- 1/2 cup unsalted butter, softened
- 1 cup granulated sugar
- 1/2 cup packed brown sugar
- 1 large egg
- 1 1/2 cups all-purpose flour
- 1 teaspoon baking soda
- 1/2 teaspoon salt
- 1/2 cup creamy peanut butter (for filling)
- 1/4 cup unsalted butter, softened (for filling)
- 1 cup powdered sugar (for filling)
- 1-2 tablespoons milk (for filling)
Instructions
-
1Preheat oven to 350°F (175°C) and line two baking sheets with parchment paper.
-
2In a large bowl, cream together 1 cup peanut butter, 1/2 cup unsalted butter, granulated sugar, and brown sugar until light and fluffy.
-
3Beat in the egg until well combined. In a separate bowl, whisk together flour, baking soda, and salt. Gradually add dry ingredients to the wet mixture and mix until just combined.
-
4Scoop dough by rounded teaspoons and roll into small logs. Place on prepared baking sheets and use a fork to create a crisscross pattern. Bake for 10-12 minutes or until lightly golden. Cool completely.
-
5For the filling, beat together 1/2 cup peanut butter, 1/4 cup unsalted butter, and powdered sugar. Add milk as needed to achieve a creamy consistency.
-
6Spread filling on the flat side of half the cookies and sandwich with the remaining cookies. Serve and enjoy.
Approximate Information for One Serving
Nutrition Disclaimers
Number of total servings shown is approximate. Actual number of servings will depend on your preferred portion sizes.
Nutritional values shown are general guidelines and reflect information for 1 serving using the ingredients listed, not including any optional ingredients. Actual macros may vary slightly depending on specific brands and types of ingredients used.
To determine the weight of one serving, prepare the recipe as instructed. Weigh the finished recipe, then divide the weight of the finished recipe (not including the weight of the container the food is in) by the desired number of servings. Result will be the weight of one serving.
Did you make this recipe?
Please consider Pinning it!!


