
Hey there, friend! Okay, before I get into my whole spiel about these mini chocolate cheesecake bites, let me just say: if you’ve ever found yourself hovering over the fridge at midnight, biscuit in one hand, spoon in the other, looking for “just a little something sweet”—well, you’re my people. These bites? They’re what you want. I started making them after a disastrous attempt at a full cheesecake (let’s just say the springform pan and I are still not on speaking terms), and honestly, I haven’t looked back since. The very first time I brought a tray of these to a family BBQ, my cousin tried to pocket half of them in her tote bag. Respect.
Why I Always Make These (And Why You’ll Probably Love ‘Em Too)
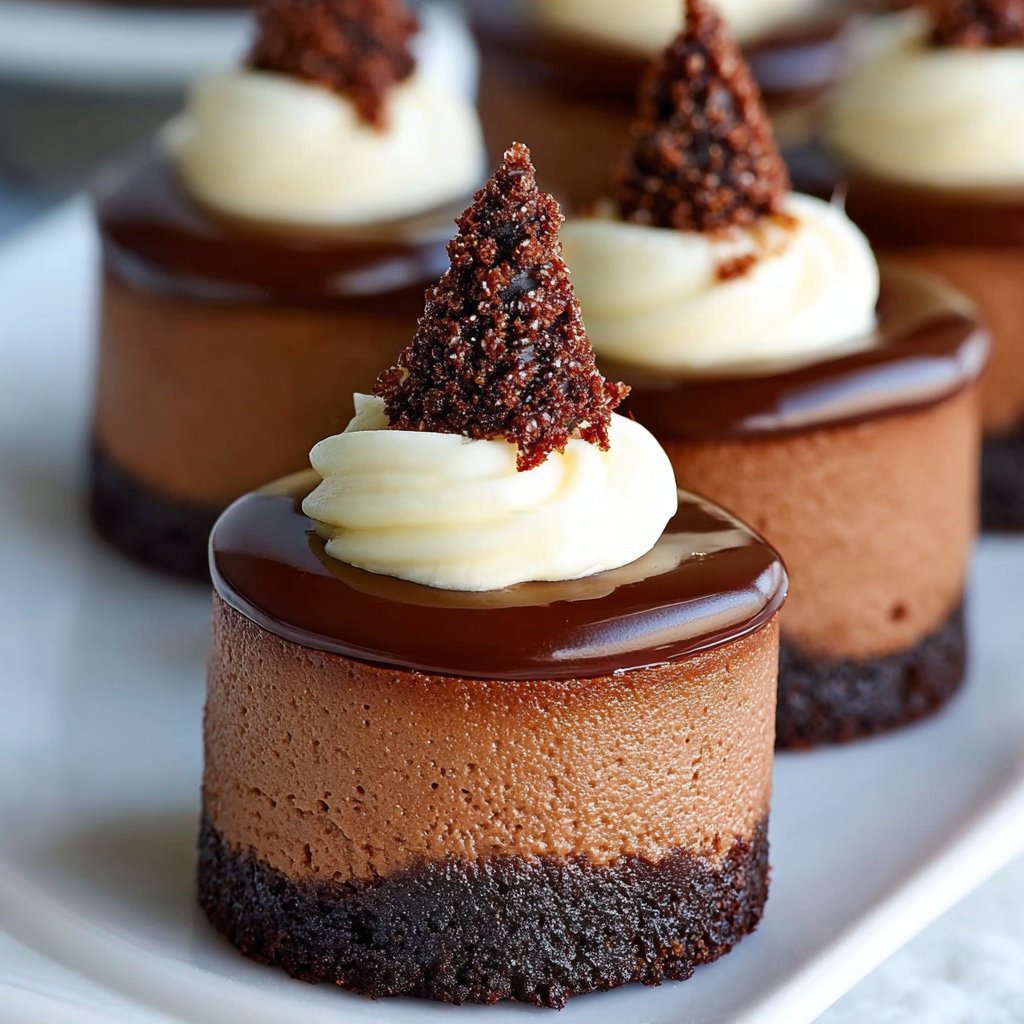
I make these mini chocolate cheesecake bites when I’m craving chocolate but can’t be bothered with the whole cake-and-fork situation (sometimes I just want to eat dessert with my hands, okay?). My family goes absolutely bonkers for these—especially when I use dark chocolate. Oh, and if you’ve ever been frustrated by baked cheesecakes cracking (me, every time), these little guys are so much more forgiving. No water bath, no stress. I sometimes pipe the topping fancily, but honestly, a dollop and a swirl with a spoon works fine. Hot tip: if you’re taking ‘em to a party, make extra. They will disappear, and you’ll wish you’d stashed one in your pocket.
What You’ll Need (Plus a Few Swaps For When You Run Out of Stuff)
- 170g (6 oz) semi-sweet chocolate chips (or dark, or milk, honestly whatever’s lurking in your pantry works)
- 225g (8 oz) cream cheese, softened (I’ve used reduced fat in a pinch, but it’s not quite as creamy)
- 1/3 cup granulated sugar (sometimes I swap in coconut sugar—works, tastes a lil caramelly)
- 1 large egg
- 1 tsp vanilla extract (my gran insisted on the “good stuff,” but I use the supermarket one most days)
- 8-10 chocolate sandwich cookies, crushed (Oreos are classic, but any brand will do; sometimes I use graham crackers if I’m feeling fancy)
- 2 tbsp melted butter (salted, unsalted, it all works, promise)
- Pinch of salt (optional, but it really does make the chocolate pop)
Here’s How I Do It (And Where I Usually Sneak a Taste)
- Get ready. Set your oven to 160°C (that’s 325°F) and line a mini muffin tin with paper cups. Or, if you’re like me and have run out (again), just grease the tin like there’s no tomorrow.
- Make the crust. Mix up those crushed cookies with melted butter (and a tiny pinch of salt if you’re feeling bold). Spoon a bit into each cup, press down gently with your thumb (if it sticks, grab a shot glass and use that). Pop the tin in the freezer while you get the filling sorted. Or fridge, if your freezer is full of fish fingers like mine usually is.
- Chocolate time. Melt the chocolate chips, either in the microwave (zap for 20 seconds at a time, stir, repeat—don’t wander off, it’ll burn) or on the stove over a double boiler if you’re feeling chef-y. Let it cool for a couple minutes—if you pour it in piping hot, you’ll scramble your egg later (ask me how I know).
- Mix the filling. Beat the cream cheese and sugar together until they look fluffy. Add the egg and vanilla, beat just until combined. Now pour in that melted chocolate. Mix until smooth—this is where I always sneak a taste.
- Spoon it out. Dollop the filling onto the chilled crusts. Don’t stress about making them perfectly even—life’s too short.
- Bake. Slide into the oven for 13-16 minutes. You want the tops to look set and just barely wiggle in the center. If they crack a little, who cares (mine usually do). Let them cool in the pan; then refrigerate for at least 2 hours. Or, you know, as long as you can stand to wait.
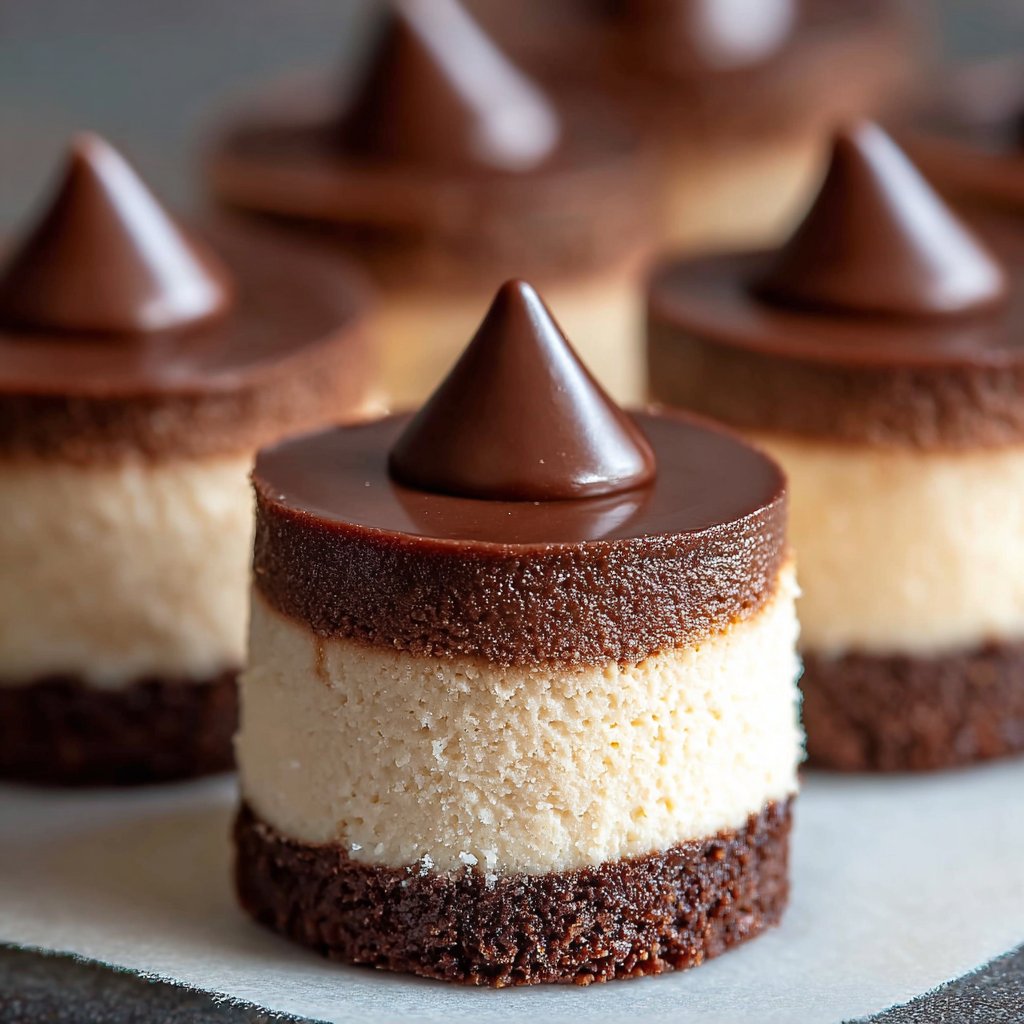
- Decorate (if you wanna). Sometimes I top ‘em with whipped cream or a berry, or just eat them straight outta the tin. No shame.
Notes I Wish Someone Had Told Me (But Instead I Had to Learn the Hard Way)
- If you use low-fat cream cheese, they’re still good, but the texture’s a bit less silky—so just FYI if you’re going for decadence.
- Yes, you can make these ahead; honestly, I think they taste better the next day.
- Once, I over-baked them thinking more time would mean firmer bites. Nope. They got a little rubbery. Don’t do that.
- If your filling looks a bit grainy, it probably just needed a bit more mixing—but they’ll still taste great.
Some Variations (And One That Was a Bit of a Flop)
- I’ve swapped the chocolate chips for white chocolate once—delicious but super sweet, just a heads-up.
- Used Biscoff cookies instead of Oreos for the base—wow. Would do again.
- Once tried adding a swirl of peanut butter to the batter. Honestly, it looked more like a science experiment than a dessert. Maybe steer clear of that one unless you’re braver than me.
Gear You’ll Need (And What to Do If You Don’t Have It)
- Mini muffin tin—if you only have a regular one, just go with it and make fewer, bigger bites. Or line a baking dish and cut into squares. (Actually, I’ve done that. Works!)
- Mixing bowls—at least two, unless you want to wash one halfway through, which I never want to do.
- Electric mixer—makes life easier, but I’ve beaten by hand in a pinch. A bit of an arm workout, but hey, you’ve earned dessert.
Storing (But Let’s Be Honest, They Don’t Last)
These keep in the fridge in an airtight container for up to 4 days. You can freeze them too, but in my house they never last more than a day! If you do freeze, just let ‘em thaw in the fridge before eating. Or eat them frozen if you’re impatient—I’ve done that, and it’s like cheesecake ice cream. Not bad.
Serving Ideas (What We Actually Do)
I usually stack them up on a plate and let people at ‘em. For birthdays, I’ll stick a candle in a couple—my nephew thinks that’s hilarious. Oh, and if you drizzle a bit of caramel (like Sally’s recipe), people will think you’re fancy. Sometimes we eat them straight from the fridge; other times, they disappear before they even cool.
My Pro Tips (Aka What I Messed Up So You Don’t Have To)
- If you rush the chilling step, they come out sticky and hard to peel from the liner. Trust me—I tried. Not worth it.
- Don’t use hot chocolate to melt the chips (I once did this by mistake in a sleepy daze). It just doesn’t work. Oops.
- Actually, I find it works better if you leave the chocolate to cool for a couple minutes before mixing it in. Otherwise? Scrambled egg town.
FAQ (Real Questions I’ve Actually Gotten, No Joke)
- Can I use a blender instead of a mixer? Yeah, you can, but the texture’s not quite the same—sometimes it gets a bit too whipped. If that’s what you like, go for it!
- Is it okay to double the recipe? Oh for sure—I’ve done it. You’ll just need a second tray, or bake in batches. Or just make one big pan and slice (like Gemma’s no-bake bars—I’ve borrowed that trick).
- Can I make these gluten-free? Totally, just use gluten-free cookies for the base. Done it for my mate who can’t have gluten and he was very happy.
- Do you have to use paper liners? Nah, but they do make life easier. Without ‘em, just grease the heck out of the tin and maybe say a little prayer.
So, that’s my less-than-perfect, but very real guide to mini chocolate cheesecake bites. If you try them (or tweak them), let me know—unless you’re my cousin, in which case please leave some for the rest of us.
Cheers, and happy baking!
Ingredients
- 12 chocolate sandwich cookies (such as Oreos), finely crushed
- 2 tablespoons unsalted butter, melted
- 8 ounces cream cheese, softened
- 1/4 cup granulated sugar
- 1 large egg
- 1/2 teaspoon vanilla extract
- 1/2 cup semi-sweet chocolate chips, melted and slightly cooled
- Pinch of salt
Instructions
-
1Preheat the oven to 325°F (163°C). Line a 12-cup mini muffin pan with paper liners.
-
2In a small bowl, combine the crushed chocolate sandwich cookies and melted butter. Mix until the crumbs are evenly coated.
-
3Spoon about 1 tablespoon of the cookie mixture into each liner and press firmly to form the crust.
-
4In a medium bowl, beat the cream cheese and sugar until smooth. Add the egg, vanilla extract, and salt, mixing until combined. Fold in the melted chocolate chips.
-
5Divide the cheesecake batter evenly over the crusts. Bake for 16-18 minutes, or until the centers are set.
-
6Let cool completely, then refrigerate for at least 2 hours before serving. Optionally, garnish with extra chocolate shavings.
Approximate Information for One Serving
Nutrition Disclaimers
Number of total servings shown is approximate. Actual number of servings will depend on your preferred portion sizes.
Nutritional values shown are general guidelines and reflect information for 1 serving using the ingredients listed, not including any optional ingredients. Actual macros may vary slightly depending on specific brands and types of ingredients used.
To determine the weight of one serving, prepare the recipe as instructed. Weigh the finished recipe, then divide the weight of the finished recipe (not including the weight of the container the food is in) by the desired number of servings. Result will be the weight of one serving.
Did you make this recipe?
Please consider Pinning it!!


