
Ever Tried a No-Bake Lemon Cheesecake? Let Me Tell You…
Alright, gather round. You know those days when you just can’t bear to crank up the oven (especially in summer, ugh)? That’s when I pull this no-bake lemon cheesecake recipe form my back pocket. My mum used to whip it up for birthdays when we lived in that house with the dodgy oven, and honestly, I think it’s half the reason I love lemons so much. Plus, it’s basically foolproof—even my mate Dave managed it once and he’s notorious for burning toast. I mean, you’ll probably find biscuit crumbs on your jumper afterwards, but that’s just part of the charm, right?
Why I Keep Making This (And My Family’s Opinions!)
I make this when I’m craving something zingy but can’t be fussed with complicated steps. My family goes nuts for it—my niece once asked if we could have this instead of birthday cake (sorry, chocolate sponge). And, I’ll be real with you, it’s the kind of dessert that makes people think you’ve put in way more effort than you actually have. (The only slightly annoying bit: waiting for it to chill. But I guess that’s what Netflix is for.)
What You’ll Need (With My Notes!)
- Base: 200g digestive biscuits (or graham crackers—sometimes I use ginger nuts if I’m feeling fancy. Gran swore by McVitie’s, but any will do, honestly)
- 90g unsalted butter (melted; I’ve used margarine once when I ran out, it’s fine but tastes a bit less rich)
- Filling: 300g full-fat cream cheese (never tried with low fat—if you do, let me know how it turns out!)
- 250ml double cream (sometimes called heavy cream; I’ve even subbed in Elmlea in a pinch)
- 100g icing sugar (if you only have caster, blitz it a sec in the blender)
- Zest and juice of 2 lemons (I sometimes add a third if I want it really sharp, but my brother says that’s “too much zing”)
- 1 tsp vanilla extract (optional—sometimes I skip it if I can’t be bothered to find the bottle)
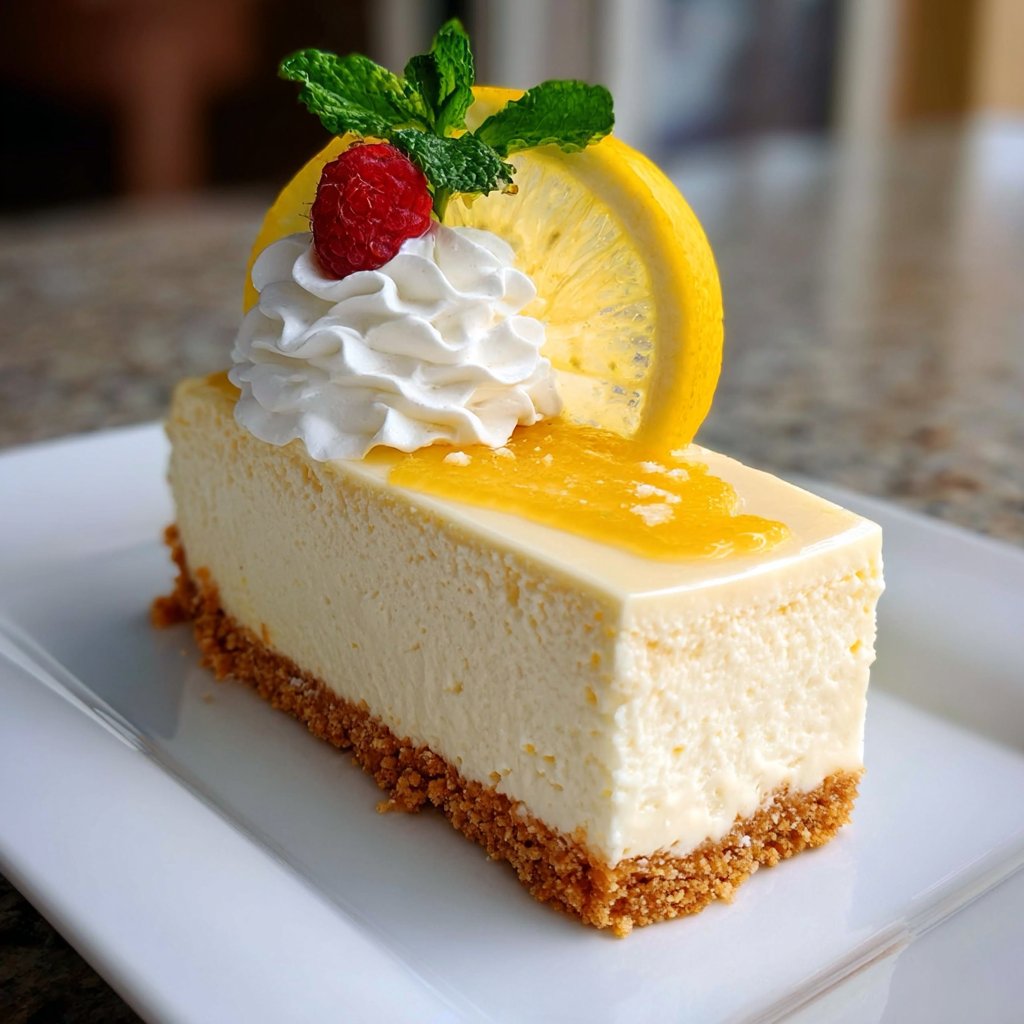
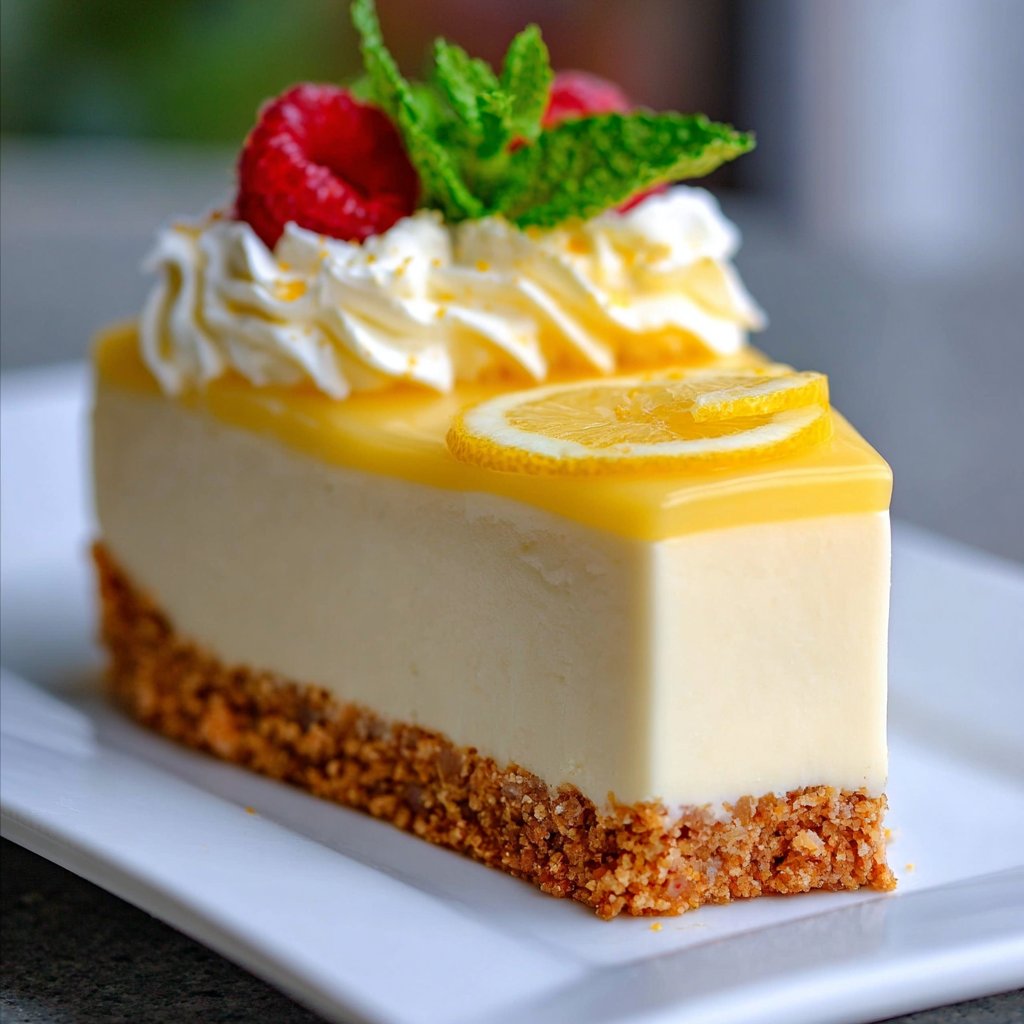
Optional topping: Extra lemon zest, crushed biscuits, or a handful of blueberries if you’ve got them knocking about in the fridge.
How I Actually Make It (Not Always in Perfect Order!)
- Bash up the biscuits. I usually shove them in a freezer bag and wallop them with a rolling pin, but a food processor is quicker (if you don’t mind the washing up). Mix in the melted butter till it looks like damp sand.
- Press the biscuit mix into a springform tin. I use the bottom of a glass to squish it down. Try to get it even, but honestly, nobody notices wonky edges.
- Chill the base in the fridge for at least 30 minutes. Or, if you’re impatient like me, stick it in the freezer for 10—it works. Mostly.
- Meanwhile, in a bowl, beat the cream cheese, icing sugar, lemon zest and juice (and vanilla, if using) until smooth. I used to do this by hand, but now I just use my trusty hand mixer. Less elbow grease, more time for tea.
- In another bowl, whip the cream till it forms soft peaks. Don’t go mad; if it turns grainy, you’ve gone too far. (I learned that the hard way—end up with something closer to butter than cream, whoops!)
- Gently fold the cream into the cream cheese mix. This is where I usually sneak a taste; you should too. Add more lemon or sugar if you fancy.
- Spoon the filling over the chilled base and smooth it out with a spatula. Or the back of a spoon—who cares?
- Pop it back in the fridge for at least 4 hours, or even better, overnight. Don’t worry if it looks a bit wobbly; it’ll firm up. (Promise!)
- Decorate however you like before serving. Sometimes I get artistic with lemon curls. Other times, I just scatter on whatever’s handy.
Notes from Real-Life Kitchen Messes
- If your base is too crumbly, add a touch more butter. Too soggy? Chuck in a few more crushed biscuits. These things happen!
- I once tried using bottled lemon juice. It’s… not the same. But if you’re in a pinch, it won’t ruin your day.
- Don’t panic if the filling seems a bit loose before chilling—it always sets up in the fridge, just takes patience.
Variations I’ve Actually Tried
- Swap lemons for limes for a tropical twist. I did this once with a dash of coconut on top and it was brill.
- I once mixed in a handful of mashed raspberries. Tasted lovely, but the color went a bit odd. Wouldn’t win any beauty contests!
- Chocolate base—sub in Oreos for the digestives. A bit sweeter, and my kids love it (even if it’s not very lemony anymore).
Equipment (And My Lazy Shortcuts)
- Springform tin (but a regular cake tin lined with cling film will do in a pinch—just makes it easier to get out)
- Mixing bowls (at least two; one for the base, one for the filling)
- Hand mixer (or a regular whisk if you’re feeling energetic; I sometimes regret this decision halfway through…)
- Rolling pin or something heavy for smashing biscuits (I’ve used a wine bottle more than once—don’t judge)
Keeping It Fresh (If You Have Any Left!)
Store in the fridge, covered, for up to 3 days—though honestly, in my house it never lasts more than a day! If you want to freeze it, slice first and wrap well, but I think the texture gets a bit odd after thawing, so I usually don’t bother.
How We Serve It at Home
We usually just plonk it on the table with a big spoon, but if I’m feeling fancy, I’ll add extra berries and a bit of whipped cream on the side. My gran always insisted it tasted better with a cuppa tea, and, well, she was probably right. Sometimes we eat it straight out of the tin if no one’s looking.
Little Lessons I’ve Learned (The Hard Way)
- Don’t rush the chilling. I tried serving it after just an hour once—let’s just say “lemon cheesecake soup” is not a crowd pleaser.
- Beating the cream cheese too much can make it runny. Actually, I find it works better if you just mix till combined and no more.
- Taste as you go. Honestly, I often add a smidge more lemon, just depends on my mood (and the lemons, they’re all different!).
Real Questions I’ve Gotten (And My Honest Answers!)
- Can I use low-fat cream cheese? Yeah, you can, but it’s not quite as creamy. It’ll do in a pinch, though, if you’re cutting back.
- How do I get it out of the tin without disaster? Run a warm knife round the edge first. Or, line your tin with cling film for insurance (I do this when I remember).
- What if I don’t have icing sugar? Just blitz some regular sugar in a blender for a bit—it’s close enough, I promise.
- Can I use bottled lemon juice? Erm, you can, but fresh is just so much nicer. But look, I won’t tell anyone if you’re in a hurry.
By the way, I picked up my favourite springform tin here at Lakeland. And if you want a deep-dive into why cream cheese matters, Serious Eats did a taste test that’s actually pretty interesting. But, honestly, just use what you’ve got. Life’s too short for ingredient snobbery, right?
So that’s my no-bake lemon cheesecake. If you try it, let me know how it goes—unless it’s a disaster, in which case, blame the lemons. Or the weather. Or just grab a spoon and enjoy anyway.
Ingredients
- 200 g digestive biscuits
- 100 g unsalted butter, melted
- 400 g cream cheese, softened
- 250 ml heavy cream
- 120 g powdered sugar
- 2 lemons, zested and juiced
- 1 tsp vanilla extract
- Lemon slices and zest, for garnish
Instructions
-
1Crush the digestive biscuits into fine crumbs and mix with melted butter until well combined.
-
2Press the biscuit mixture firmly into the base of a 20cm (8-inch) springform pan. Chill in the refrigerator for 15 minutes.
-
3In a large bowl, beat the cream cheese, powdered sugar, lemon zest, lemon juice, and vanilla extract until smooth and creamy.
-
4In a separate bowl, whip the heavy cream until stiff peaks form. Gently fold the whipped cream into the cream cheese mixture.
-
5Spread the lemon cheesecake filling evenly over the chilled biscuit base. Smooth the top with a spatula.
-
6Refrigerate for at least 4 hours or until set. Garnish with lemon slices and extra zest before serving.
Approximate Information for One Serving
Nutrition Disclaimers
Number of total servings shown is approximate. Actual number of servings will depend on your preferred portion sizes.
Nutritional values shown are general guidelines and reflect information for 1 serving using the ingredients listed, not including any optional ingredients. Actual macros may vary slightly depending on specific brands and types of ingredients used.
To determine the weight of one serving, prepare the recipe as instructed. Weigh the finished recipe, then divide the weight of the finished recipe (not including the weight of the container the food is in) by the desired number of servings. Result will be the weight of one serving.
Did you make this recipe?
Please consider Pinning it!!


