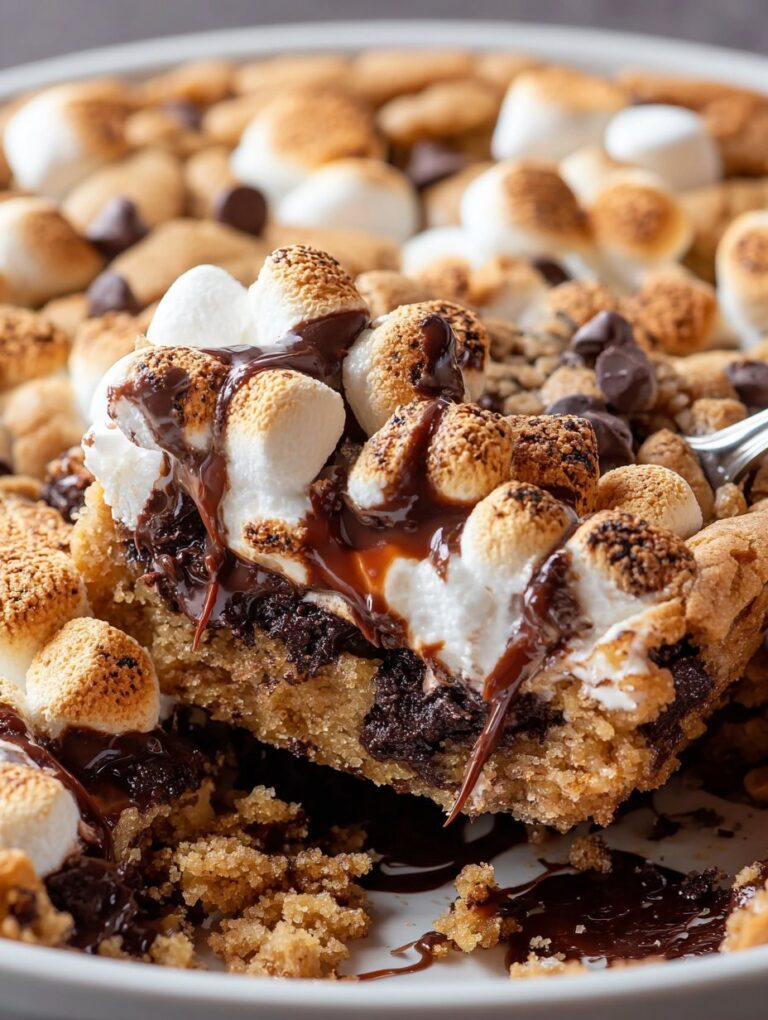
Alright, Let’s Talk S’mores Skillet Cookie
If you know me (and if not, hey, I’m Sarah—self-proclaimed dessert enthusiast and serial spatula-loser), you know I have a thing for desserts that are part nostalgia, part guilty pleasure. The S’mores Skillet Cookie is my lazy-day answer to missing campfires, but not missing the mosquitoes. Seriously, the first time I made this, I half expected my smoke alarm to go off—because, well, that’s usually what happens when I attempt anything with fire—but this was all gooey goodness and zero panic. My nephew once ate his slice straight out of the pan with a soup spoon. No regrets, just sticky hands.
Why I Keep Coming Back to This
I make this when I’m craving something warm and chocolatey but can’t be bothered with a bunch of dishes (or, let’s be honest, patience). My family goes nuts for it because it really does taste like a campfire treat, but you don’t have to wrestle with smoky logs or hunt for twigs that aren’t suspiciously damp. There was a time I accidentally doubled the marshmallows—and actually, it turned out even better (unless you hate cleaning pans, in which case… good luck). If I’m feeling especially done with the world, I’ll eat it straight from the skillet with a dollop of ice cream (or, let’s be real, just whipped cream straight from the can).
What You’ll Need (But Don’t Stress It)
- 1 cup (225g) unsalted butter, melted (I sometimes use salted and skip the pinch of salt—it’s fine)
- 1 cup brown sugar (light or dark, honestly, I grab what’s on hand)
- 1/2 cup granulated sugar
- 2 large eggs (room temp is ideal, but cold works if you’re impatient)
- 2 tsp vanilla extract (my grandmother always insisted on Nielsen-Massey, but the store brand stuff tastes just peachy)
- 2 1/4 cups all-purpose flour (if you’re feeling healthy-ish, half whole wheat works, but it’s a bit more crumbly)
- 1 tsp baking soda
- 1/2 tsp salt (skip if your butter is salted)
- 1 1/2 cups semi-sweet chocolate chips (milk chocolate chips if you want it super classic, or even chopped Hershey bars—I’ve done both)
- 1 cup mini marshmallows (sometimes I use big ones chopped up—messy, but works in a pinch)
- 1/2 cup graham cracker pieces (I smash ‘em up in a zip bag—sometimes too much, so there’s dusty bits everywhere)
How I Actually Make It (With Minimal Panic)
- Preheat your oven to 350°F (175°C). Or 180, if you, like me, have an oven dial that’s more suggestion than promise.
- Pour melted butter into a large bowl. Add both sugars and whisk until it looks kind of like wet sand. This is where I usually sneak a taste (health code be darned).
- Mix in eggs and vanilla. Don’t overthink it—just get it smooth, but if you see a bit of streak, it’s fine.
- Toss in flour, baking soda, and salt. Stir until combined. Don’t worry if it looks a bit shaggy at first; it always does.
- Fold in the chocolate chips and about half the marshmallows. And most of the graham cracker bits. Save some for the top (if you forget, just sprinkle later—works either way).
- Spread the dough into a 10-inch cast-iron skillet (or any ovenproof skillet; once I used a cake pan, and it was… not a disaster, just different). Press it out with clean hands or a spatula.
- Sprinkle remaining marshmallows and graham crackers on top. Sometimes I add a few extra chocolate chips, because why not?
- Bake for about 20–25 minutes, until golden around the edges but still soft in the middle. Seriously, don’t overbake—it keeps cooking in the pan!
- Let it cool for 10–15 minutes (impossible, but try). Then dig in with spoons or slice it up, your call.
Some Notes I Wish I’d Known Earlier
- If you use big marshmallows, cut them up smaller or you get weird goo pools. Not the worst thing, but kind of a mess.
- I’ve had it work with gluten-free flour blends, but it does get a bit crumbly—still tasty, just more “rustic” (aka, falling apart…)
- Dark chocolate is great if you don’t want it too sweet, but my kids look at me like I’ve betrayed them.
Things I’ve Tried (For Better or Worse)
- Peanut butter chips instead of some chocolate chips—major win!
- Stirring in a bit of instant coffee (about half a teaspoon); actually, I find it works better if you mix it into the butter first. Adds depth, but you probably won’t notice unless you’re a coffee nut.
- I once tried adding dried cranberries—let’s just say I won’t be doing that again. Tasted confused.
What If I Don’t Have a Skillet?
So, I always say a cast iron skillet is essential, then promptly forget mine at my cousin’s house. You can totally use a round cake pan, or even a square baking dish. The edges won’t get as crispy, but it’s still delicious—and easier to slice, actually.

How To Store It (If You Have Any Left…)
Wrap leftovers in foil or pop ‘em in an airtight container. Room temp is fine for a day or two (though honestly, in my house it never lasts that long). Fridge for up to 4 days, but I think it tastes better the next day anyway—maybe that’s just me.
How We Like to Serve It
We usually go for the full campfire effect: big scoop of vanilla ice cream right on top, let it melt, everyone grabs a spoon. Sometimes my partner insists on whipped cream and a few crushed pecans (not traditional, but it works). My nephew once suggested sprinkles, and… well, we tried it. Not bad.
If I Had to Give You Any Pro Tips
- I once tried rushing the cooling step and ended up with a chocolate/marshmallow lava disaster. Fun, but messy. Wait for it to set a bit (at least 10 minutes—go walk the dog or something).
- Spray the skillet or pan lightly, even if it’s “nonstick.” Saves a LOT of scrubbing later.
- Don’t overmix after adding flour. Makes it tough, and not in a good hearty way.
Questions I Get (And How I Actually Answer Them)
- Can I make this ahead? Sure, but fresh is definitely better. If you have to, cover and reheat at 300°F for about 10 minutes, it perks up nicely.
- Do I have to use a skillet? Nah, use any ovenproof pan you’ve got. I’ve even seen people do it in a pie plate. Just keep an eye on bake time.
- What if I don’t have graham crackers? Digestive biscuits work. Or, once I used Biscoff cookies and it was, honestly, fantastic.
- Is there a way to make it less sweet? Use dark chocolate and cut the marshmallows by half—though, in my house, that’s considered blasphemy.
- Can I double this? You’re brave. Yes, but use a bigger pan and add a few minutes to the bake time (I learned the hard way that the center can stay raw if you don’t).
One Random Thing I Have to Mention
Have you ever tried making your own marshmallows? I did once, following this homemade marshmallow tutorial—it was sticky, ridiculous, and totally worth it (once). If you want a store-bought shortcut, I always check King Arthur Baking for good deals, or browse Serious Eats for fun twists on the classic.
Anyway, that’s how I make my S’mores Skillet Cookie! If you try it, let me know if you have any wild experiments—I’m always up for a new excuse to dirty my favorite pan.
Ingredients
- 1 cup unsalted butter, softened
- 1 cup brown sugar, packed
- 1/2 cup granulated sugar
- 2 large eggs
- 2 teaspoons vanilla extract
- 2 1/4 cups all-purpose flour
- 1 teaspoon baking soda
- 1/2 teaspoon salt
- 1 cup semi-sweet chocolate chips
- 1 cup mini marshmallows
- 1 cup graham cracker pieces
Instructions
-
1Preheat the oven to 350°F (175°C). Lightly grease a 10-inch oven-safe skillet.
-
2In a large bowl, cream together the softened butter, brown sugar, and granulated sugar until light and fluffy.
-
3Beat in the eggs one at a time, then add vanilla extract and mix until combined.
-
4In a separate bowl, whisk together the flour, baking soda, and salt. Gradually add the dry ingredients to the wet ingredients, mixing until just combined.
-
5Fold in the chocolate chips and graham cracker pieces. Spread the dough evenly in the prepared skillet. Top with mini marshmallows.
-
6Bake for 22-25 minutes, or until the edges are golden and the center is set but still soft. Let cool slightly before serving warm.
Approximate Information for One Serving
Nutrition Disclaimers
Number of total servings shown is approximate. Actual number of servings will depend on your preferred portion sizes.
Nutritional values shown are general guidelines and reflect information for 1 serving using the ingredients listed, not including any optional ingredients. Actual macros may vary slightly depending on specific brands and types of ingredients used.
To determine the weight of one serving, prepare the recipe as instructed. Weigh the finished recipe, then divide the weight of the finished recipe (not including the weight of the container the food is in) by the desired number of servings. Result will be the weight of one serving.
Did you make this recipe?
Please consider Pinning it!!


