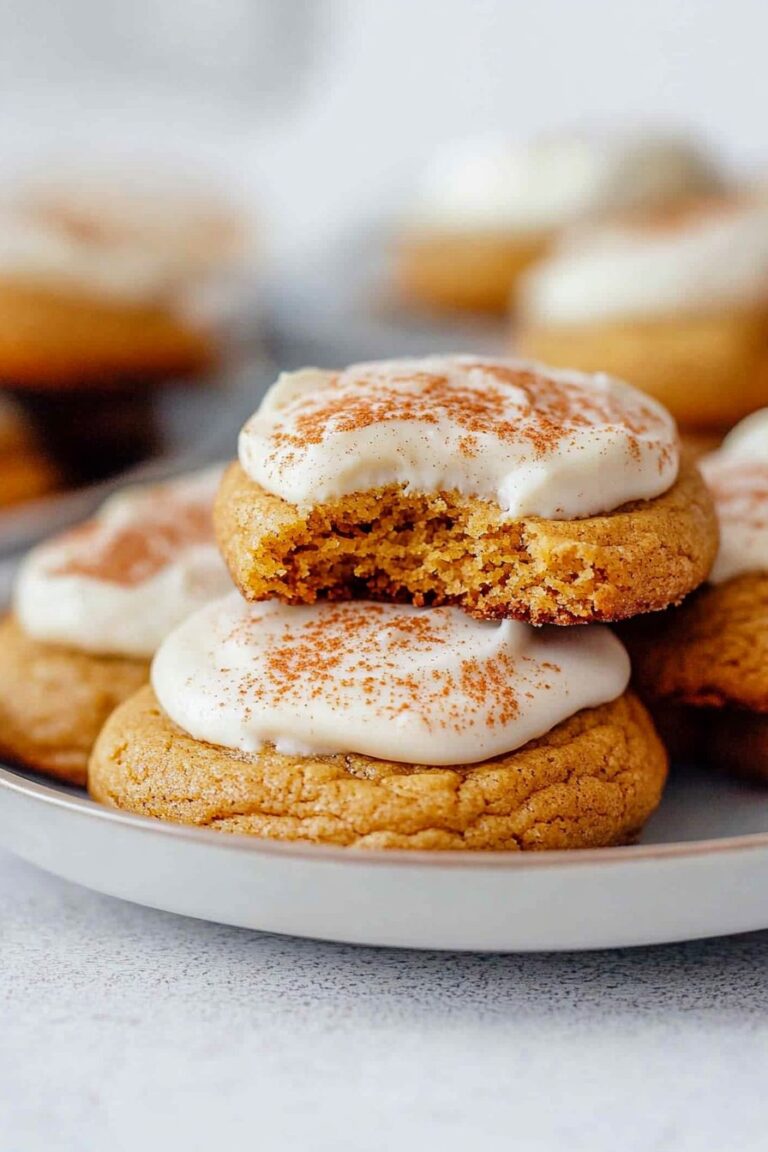
Let’s Talk About These Soft Pumpkin Cookies
Alright, so picture this: It’s late October, you’ve just had a marathon pumpkin-carving session (kids are sticky, table is a disaster), and now, all you want is something sweet that doesn’t require a ton of fuss. Enter these soft pumpkin cookies. I started making them years ago because I was honestly sick of dry, crumbly pumpkin desserts. Plus, my Aunt Carla used to bring a batch to every family get-together—she claimed her secret was singing to the dough, but I suspect it was the extra cinnamon. Anyway, these cookies have evolved a bit over the years (they’ve been the guinea pig for my spice rack experiments), but the one constant is how ridiculously soft they turn out.
Why I Keep Coming Back to This Recipe
I make these when I’m craving something that feels like a warm hug but doesn’t take twenty bowls and a stand mixer (which I still don’t own—can you believe it?). My family goes a bit feral when they smell these baking, especially my teenager who pretends he’s “not into sweets” but somehow always grabs three. Also, I’m not gonna lie, pumpkin is one of those things I buy for a specific recipe and then forget about, so this is my go-to when I find a lonely can in the pantry. Oh, and I used to get annoyed by cookies that go stale in a day—these stay soft for ages (not that they last that long, honestly).
What You’ll Need (and the Swaps I’ve Tried)
- 2 cups all-purpose flour (I’ve swapped in whole wheat—makes ’em a bit denser, but still good. Self-raising flour? Tried once, but skip the baking powder if you do.)
- 1 teaspoon baking powder
- 1 teaspoon baking soda (if you’re out, a bit more baking powder works okay in a pinch; it’s not perfect, but it works)
- 1/2 teaspoon salt
- 2 teaspoons ground cinnamon (I once used pumpkin pie spice instead—tasted like autumn exploded, in a good way)
- 1/2 teaspoon nutmeg (optional, but my grandma swore by it)
- 1/4 teaspoon ground cloves (skippable, if you’re not a fan of cloves—it’s polarizing!)
- 1 cup unsalted butter, softened (melted works in a hurry, but the cookies are flatter)
- 1 cup light brown sugar (dark brown is fine if that’s what you’ve got)
- 1/2 cup granulated sugar
- 1 cup canned pumpkin puree (NOT pumpkin pie filling—learned that the hard way)
- 1 large egg
- 2 teaspoons vanilla extract (mine’s usually store-brand—no shame)
- Optional: 1/2 cup chopped walnuts or pecans, or 3/4 cup chocolate chips (white or dark—dealer’s choice)
How I Actually Make These (Step-by-Step…ish)
- Preheat your oven to 350°F (about 180°C). Line a couple baking trays with parchment (or just grease them if you’re out—no biggie).
- Mix the flour, baking powder, baking soda, salt, cinnamon, nutmeg, and cloves in a medium bowl. I use a whisk but honestly, a fork is fine if that’s all you’ve got.
- In a biggish bowl, cream the butter and both sugars together until it’s nice and fluffy. I use a regular hand mixer (sometimes just a wooden spoon if I’m feeling strong—arm workout!).
- Add in the pumpkin puree, egg, and vanilla. Mix until smooth. It’s going to look a little weird here—kind of lumpy. Don’t panic; it always looks like this.
- Stir in the dry mixture. Go slow or you’ll get a flour cloud. When it just comes together, stop. Overmixing makes them tough (ask me how I know).
- If you want, fold in nuts or chocolate chips now. This is where I usually sneak a taste, quality control and all.
- Scoop by heaping tablespoons onto your trays. Don’t stress about spacing; they spread a bit, but not loads. Sometimes I just use two spoons, but I’ve seen people use fancy cookie scoops.
- Bake for about 12–15 minutes, or until they look set and a little golden on the edges. Sometimes I check at 10 minutes if my oven’s been acting up (which it does—a lot).
- Let them cool on the tray for a couple minutes before moving—otherwise, you’ll end up with cookie casualties. Then onto a rack or just a plate, whatever’s handy.
Things I’ve Learned (the Hard Way)
- Don’t use pumpkin pie filling! It’s too sweet and makes the dough weirdly sticky. Learned this, let’s just say, through a slightly disastrous batch.
- The dough is sticky. I used to stress about it, but it’s honestly supposed to be that way. Adding more flour ruins the texture.
- If you want perfectly round cookies, chill the dough for 30 mins. I rarely bother, but it does help.
- Using parchment paper saves so much cleanup. I tried baking straight on the tray once… never again. Trust me.
Variations I’ve Messed Around With
- Chocolate chips are great (my kids’ favorite). White chocolate and dried cranberries? Actually, not bad—tastes like the holidays.
- Swapping some flour for oat flour got me curious, but honestly, the texture was a bit too hefty for me. Maybe if you like things more “rustic.”
- Once I tried a cream cheese swirl on top. Looked lovely, but it made the cookies kind of soggy after a day. Maybe skip that one unless you eat them all right away.
Stuff You’ll Need (But Don’t Sweat It)
- Mixing bowls (2 is plenty, but I’ve made it work with just one and a quick rinse in the middle)
- Hand mixer or sturdy spoon (no fancy stand mixer required, despite what some recipes say)
- A baking tray or two (sheet pans, whatever you call them—heck, I’ve used a pizza tray in a pinch)
- Parchment paper (or oil the tray if you have to—been there, done that)
- Wire rack for cooling (or just a clean tea towel on the counter—works fine)

How Long Do They Last? (Spoiler: Not Long Here)
Store these in an airtight container at room temp and they’ll stay soft for about 3 days, maybe 4 if you’re lucky. They freeze fine for a couple months, but honestly, in my house, they rarely last past the next afternoon. Occasionally, I’ll hide a few in the breadbox to enjoy with coffee the next morning. No shame, right?
How I Like to Serve ‘Em
I’m a purist—just warm from the oven with a cup of tea or coffee. My brother dunks them in cold milk (he says it’s the only way). During the holidays, I sometimes dust them with powdered sugar for a little extra magic. Once, I sandwiched two around a scoop of vanilla ice cream… that was a good day.
Lessons Learned the Hard Way (Pro Tips, Sort Of)
- I once tried to rush the creaming step and just dumped everything in at once—don’t. They came out tough and weird. Take a few extra minutes, it’s worth it.
- Don’t overbake. They might look a little underdone when you pull them out, but they set up as they cool. I’ve pushed my luck before and ended up with cakey rocks. Not the best.
- Actually, I find it works better if you let the cookies cool on the tray for 5 minutes instead of just 2. They’re less likely to fall apart on you.
Your Questions, Answered (Real Ones!)
- Can I use fresh pumpkin instead of canned? Sure, but be sure it’s well drained and mashed smooth—canned is just less faff, honestly. If your puree is a bit watery, the dough might spread more (not a disaster, just expect flatter cookies).
- Can I make these vegan? I haven’t tried myself, but a friend swapped the egg for a flax egg and used dairy-free butter—she said they turned out alright, though maybe a bit denser. If you give it a go, let me know, yeah?
- How do I know they’re done? The tops will look set and a bit matte, the edges go golden. If you poke one gently, it should spring back a bit. Or, just trust your nose.
- Can I freeze the dough? Yep! Scoop onto a tray, freeze, then pop them in a bag. Bake straight from frozen—just add a couple minutes to the time.
- Do I need a stand mixer? Nope, I’ve never owned one. Hand mixer or a bit of elbow grease does the job. Actually, I think it gives you more control.
- My cookies came out flat—what happened? Could be your butter was too soft or the dough was overmixed. It happens! Still tasty, though.
Oh—quick side note, if you get into a pumpkin baking mood, check out Sally’s Baking Addiction pumpkin cookies for some wild frosting ideas. Or, if you want to make your own pumpkin puree, Simply Recipes has a good rundown. I tried it once—was a bit of a faff, but fun if you’re up for a project!
Ingredients
- 2 cups all-purpose flour
- 1 teaspoon baking powder
- 1 teaspoon ground cinnamon
- 1/2 teaspoon ground nutmeg
- 1/2 teaspoon baking soda
- 1/4 teaspoon salt
- 1/2 cup unsalted butter, softened
- 1 cup granulated sugar
- 1 cup canned pumpkin puree
- 1 large egg
- 1 teaspoon vanilla extract
Instructions
-
1Preheat the oven to 350°F (175°C) and line two baking sheets with parchment paper.
-
2In a medium bowl, whisk together the flour, baking powder, cinnamon, nutmeg, baking soda, and salt.
-
3In a large bowl, cream the softened butter and sugar until light and fluffy. Beat in the pumpkin puree, egg, and vanilla extract until well combined.
-
4Gradually add the dry ingredients to the wet ingredients, mixing until just combined.
-
5Drop tablespoonfuls of dough onto the prepared baking sheets, spacing them about 2 inches apart.
-
6Bake for 13-15 minutes or until the cookies are set and lightly golden. Allow to cool on a wire rack before serving.
Approximate Information for One Serving
Nutrition Disclaimers
Number of total servings shown is approximate. Actual number of servings will depend on your preferred portion sizes.
Nutritional values shown are general guidelines and reflect information for 1 serving using the ingredients listed, not including any optional ingredients. Actual macros may vary slightly depending on specific brands and types of ingredients used.
To determine the weight of one serving, prepare the recipe as instructed. Weigh the finished recipe, then divide the weight of the finished recipe (not including the weight of the container the food is in) by the desired number of servings. Result will be the weight of one serving.
Did you make this recipe?
Please consider Pinning it!!


