Let Me Tell You About This Teriyaki Chicken and Rice Casserole
Okay, so you know how there are those recipes you just sort of fall into making over and over again? This is totally one of mine. The first time I made Teriyaki Chicken and Rice Casserole, I was actually trying to use up a weird mix of leftovers (honestly, I think the chicken was originally meant for tacos). Anyway, I threw some stuff together, poured a bunch of store-bought teriyaki sauce on it, and, well, the rest is kind of a happy accident. My husband calls it my “rainy day magic casserole.” Which is cute, but also a bit dramatic, honestly. But hey, it stuck.
Funny thing: my neighbor Bob always swears he smells it through the walls and tries to angle for an invite (Bob, if you’re reading this, you can just knock next time!). And once, my kid tried to eat the leftovers cold for breakfast, which was both alarming and, I admit, sort of flattering.
Why You’ll Love Making This (Or Why I Do Anyway)
I make this when I’m too tired to fuss but still want dinner to feel like, well, dinner. My family goes crazy for it because it’s got that sweet-salty thing, and on busy nights where the idea of washing more than one pan makes me want to flee the kitchen, this casserole basically saves my hide. Also, I used to get annoyed when rice dishes turned out all mushy, but this one—with a few tweaks—comes out just right (most days; though, honestly, sometimes I still overdo the sauce. Sue me).
And did I mention you can use up all the random veggies lurking in your fridge? I mean, I once chucked in some limp broccoli and nobody noticed. It’s that kind of forgiving.
What’s Going In: Ingredients (With My Swaps & Secrets)
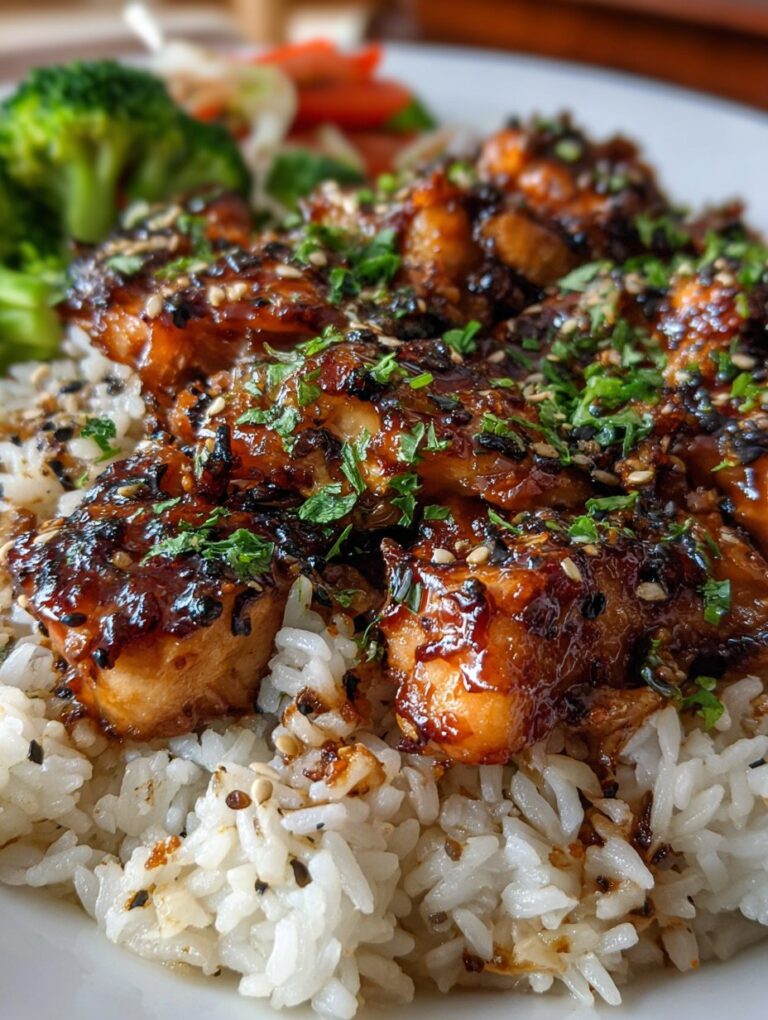
- 2 cups cooked rice (white, jasmine, or even brown—sometimes I use leftover takeout rice, shh)
- 2 cups cooked chicken, chopped or shredded (rotisserie chicken is a weeknight lifesaver, but I’ve also used leftover grilled thighs)
- 1 cup frozen mixed veggies (I usually go with carrots, peas, and corn—but once used a sad half-bag of stir-fry mix; it was fine)
- 1 cup teriyaki sauce (my grandmother insisted on Kikkoman, but honestly, any decent one will do. Or try making your own if you’re feeling fancy)
- 1/2 cup shredded cheese (cheddar, or mozzarella if you want it gooier; sometimes I skip this and sprinkle sesame seeds instead)
- 2 green onions, sliced (optional—sometimes I forget them, no biggie)
- 1 tablespoon sesame seeds (again, optional, or swap for a handful of sliced almonds for crunch)
- Salt & pepper to taste (just don’t go wild if your sauce is salty)
How I Throw It Together: The Directions
- First off, preheat your oven to 350°F (about 175°C). Or, if you forget, just stick the casserole in and add a few extra minutes—I’ve done this more times than I care to admit.
- In a big ol’ bowl, mix together the rice, chicken, veggies, and most of your teriyaki sauce. This is where I usually sneak a taste (you know, for “quality control”). If it looks a tad dry, splash in a bit more sauce or a spoonful of water.
- Dump everything into a casserole dish—9×13 inch works, but honestly I’ve used a lasagna pan in a pinch. Smooth it out. Don’t worry if it looks a bit weird at this stage—trust the process.
- Sprinkle on your cheese (or skip if dairy isn’t your jam). Scatter over the green onions and sesame seeds (if you remember them).
- Bake uncovered for about 25-30 minutes. You want bubbly edges and a bit of golden color on top. If you’re like me and get distracted, set a timer so you don’t forget.
- Let it sit for a few minutes before diving in. Actually, it firms up a bit more if you wait, but I never do.
Random Notes From My Many Tries
- The rice really does matter—leftover or slightly dry rice works best; fresh-cooked rice can get gloopy unless you let it cool off.
- If you want more veggie power, toss in some chopped bell peppers or a handful of baby spinach (they wilt down to nothing anyway).
- I’ve accidentally forgotten the cheese—nobody cared, honestly.
Variations I’ve Tried (And One Fail)
- I once swapped chicken for tofu cubes (pressed and browned first)—it was surprisingly tasty, though my daughter complained it was “too healthy.”
- Used cauliflower rice once; honestly, it was a bit too watery for my liking, but maybe I just overdid the sauce. On second thought, stick to regular rice unless you’re a cauli-rice superfan.
- Pineapple chunks? Oh man, it’s divisive but I like it in here for a little sweetness. My husband, not so much.
What You’ll Need (Or, Improvise Like I Do)
- Baking dish (9×13 inch, though honestly, any deep-ish ovenproof pan works)
- Big mixing bowl (or just mix in the pan itself if you hate extra dishes)
- Sharp knife & cutting board
- Cheese grater (but bagged shredded is fine, obviously)
No rice cooker? No biggie—check out this stovetop rice guide I always recommend to friends.

What About Leftovers?
Store any leftovers in the fridge, covered. It’ll keep for up to 3 days, but honestly, in my house it never lasts more than a day! Reheats fine in the microwave, though the rice does get a bit firmer (which I actually like). I think this tastes better the next day, honestly.
Serving Suggestions—Here’s What We Do
We usually eat this straight outta the dish, but if I’m feeling fancy I’ll throw together a crunchy slaw on the side (try this Asian slaw—so fresh), or just a pile of cucumber slices. My mom always insists on extra hot sauce at the table, which I think is overkill but hey, everyone’s got their quirks.
Pro Tips (AKA, Learn From My Mistakes)
- Don’t skip the step of letting it cool a few minutes—one time I tried serving straight away and half the casserole slid out in a soggy heap. Lesson learned.
- If you use fresh hot rice, you might end up with a sticky mess. Actually, I find it works better if you use day-old rice from the fridge.
- Go easy on the sauce at first. It’s tempting to drown everything, but it’ll end up soupy. You can always add extra at the table.
FAQ—Real Questions I’ve Actually Gotten
- Can I freeze this casserole?
Yep, sure can. Just let it cool completely first, then wrap it up tight. Thaws and reheats fine, though sometimes the rice gets a tad drier. Not a huge deal. - Can I use beef or pork instead of chicken?
Go for it! Just use cooked meat (shredded pork is awesome in this, actually), and maybe swap for a more savory sauce if you like. - Is this gluten-free?
If you use a gluten-free teriyaki sauce and double-check your add-ins, you’re golden. Rice is naturally gluten free (unless you use one of those odd blends). - What’s the best way to reheat it?
Microwave or oven. But cover it if you use the oven, or it can get a bit crusty on top—not always in a good way. - Can I double the recipe for a crowd?
Absolutely, but use a bigger pan and maybe add 5-10 minutes to the bake time. Or just make two pans at once (my aunt does this for her book club and says it’s always a hit, though I suspect wine helps too).
Oh, before I forget: if you’ve got a favorite way to do this or a weird add-in, let me know—I’m always up for kitchen experiments, even if they’re a little oddball. And if you make it, please don’t judge me for the mountain of cheese I sometimes throw on top. We all have our vices, right?
Ingredients
- 2 cups cooked white rice
- 1 1/2 pounds boneless, skinless chicken breasts, diced
- 1 cup broccoli florets
- 1 cup diced red bell pepper
- 1/2 cup shredded carrots
- 1/2 cup teriyaki sauce
- 1/2 cup shredded mozzarella cheese
- 2 tablespoons olive oil
- 2 green onions, sliced
- Salt and pepper to taste
Instructions
-
1Preheat the oven to 375°F (190°C). Grease a 9×13-inch baking dish with olive oil.
-
2In a large skillet over medium heat, add 1 tablespoon olive oil. Add diced chicken, season with salt and pepper, and cook until browned and cooked through, about 6-8 minutes.
-
3In a large bowl, combine cooked rice, cooked chicken, broccoli florets, red bell pepper, shredded carrots, and half of the teriyaki sauce. Mix until well combined.
-
4Transfer the mixture to the prepared baking dish. Drizzle the remaining teriyaki sauce over the top and sprinkle with shredded mozzarella cheese.
-
5Bake uncovered for 25-30 minutes, or until the casserole is heated through and the cheese is melted and bubbly.
-
6Remove from the oven, garnish with sliced green onions, and serve hot.
Approximate Information for One Serving
Nutrition Disclaimers
Number of total servings shown is approximate. Actual number of servings will depend on your preferred portion sizes.
Nutritional values shown are general guidelines and reflect information for 1 serving using the ingredients listed, not including any optional ingredients. Actual macros may vary slightly depending on specific brands and types of ingredients used.
To determine the weight of one serving, prepare the recipe as instructed. Weigh the finished recipe, then divide the weight of the finished recipe (not including the weight of the container the food is in) by the desired number of servings. Result will be the weight of one serving.
Did you make this recipe?
Please consider Pinning it!!


