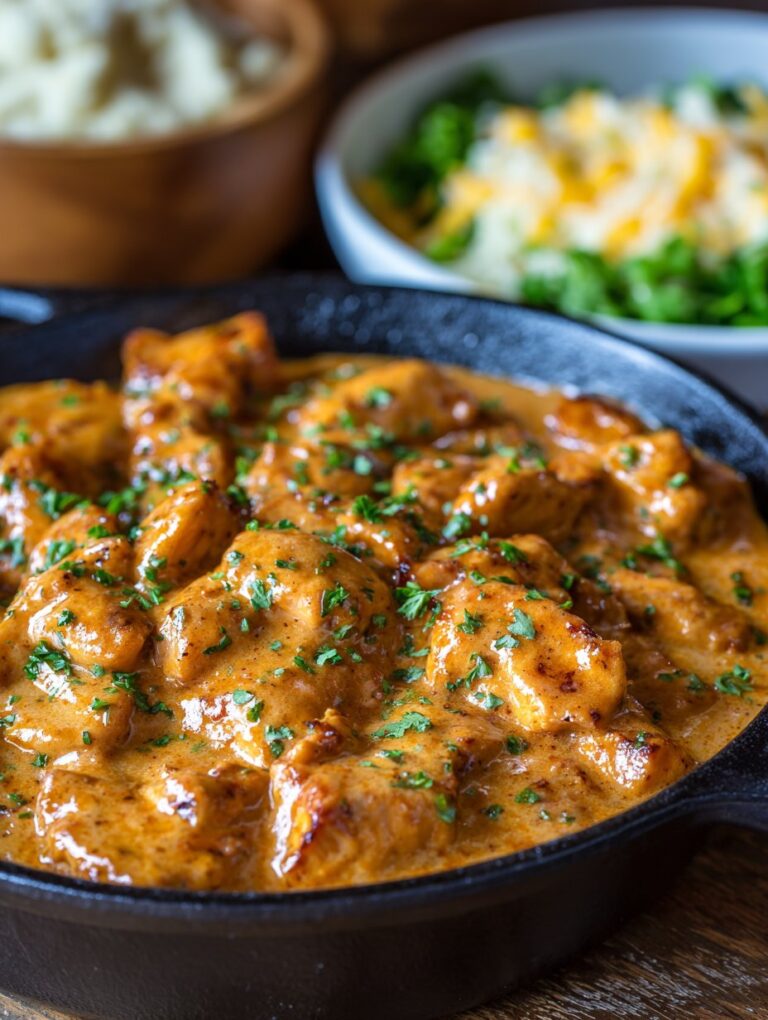
Catching Up Over Some Texas Roadhouse Butter Chicken
So, last Friday night I got an unexpected craving for something buttery and bold—probably because I’d scrolled past some Texas Roadhouse posts on Instagram, and my tastebuds basically staged a protest. Now, I’ve never met a skillet I didn’t like (though my dishwasher might disagree), and this Texas Roadhouse Butter Chicken Skillet is what I ended up making. The first time I did it, I actually burned the butter a bit—oops—but honestly, a hint of brown butter never hurt anyone! And before you ask, yes, my smoke alarm’s fine, thanks for your concern.
Why I’m Obsessed With This Chicken Skillet
I whip this up when I want something that feels like restaurant magic but doesn’t take a small fortune (or a nap after). My family goes wild for it because it’s rich and buttery but not so heavy you’re glued to the couch. I mean, sometimes I double the garlic just to see who notices. (Spoiler: no one’s ever complained.) Oh, and if you’re worried about all the butter—don’t be. Sometimes I swap half for olive oil and, honestly, it’s still pretty dreamy.
What You’ll Need (Plus a Few Cheeky Swaps)
- 4 boneless, skinless chicken breasts (I use thighs sometimes—way juicier if you ask me)
- Salt and black pepper, to taste (don’t be shy with the pepper)
- 1 teaspoon smoked paprika (my neighbor once used chipotle powder—wowza, it was spicy)
- 1/2 teaspoon garlic powder
- 1/2 teaspoon onion powder
- 1/4 cup all-purpose flour (gluten-free works too, but it’s a bit crumblier)
- 1/2 cup unsalted butter (Kerrygold if I’m feeling fancy, but store brand is totally fine)
- 3 cloves garlic, minced (sometimes I cheat with the jarred stuff…shhh)
- 1/2 cup chicken broth (I’ve used veggie broth in a pinch—tasted just fine!)
- 1 tablespoon chopped fresh parsley (dried works, but fresh really brightens it up)
How to Make It—No Fuss, Just Butter
- Pound the chicken a bit if it’s super thick (I use a rolling pin, but a wine bottle works in a pinch—just be careful, learned that the hard way). Sprinkle both sides with salt, pepper, paprika, garlic powder, and onion powder.
- Dredge in flour. It doesn’t need to be coated like it’s headed for a blizzard; just enough for a light dusting.
- Heat half the butter (so, about 1/4 cup, give or take) in a large cast iron skillet over medium-high. If you hear it sizzle, you’re good. Drop in the chicken. Cook for about 6-7 minutes on the first side, flip, then another 5 or so until cooked through. Sometimes I peek early—just don’t let all the juices escape.
- Set the chicken aside on a plate. This is usually where I sneak a taste (for quality control… obviously).
- Lower the heat to medium. Add the rest of the butter and garlic. Stir until fragrant, which takes about a minute—don’t let it go brown unless you’re into that (I sometimes am, actually).
- Pour in broth, scraping up all those browned bits. Let it bubble a minute.
- Return chicken to skillet. Spoon the sauce over. Toss in parsley. Let it all mingle for a couple minutes. Done!
Notes—Things I Learned The Hard Way
- If you use salted butter, just go lighter with the salt at the start. The first time, mine was almost as salty as the Gulf.
- Don’t crowd the pan—my friend tried to squeeze six breasts in at once (not recommended, unless you like steamed chicken).
- If you don’t have a cast iron skillet, literally any big pan will do. I once used a weird nonstick I got form IKEA; still delicious.
Variations I’ve Tried (and One That Bombed)
- Swapped in thighs for breasts—juicier, but you may need to cook a bit longer.
- Added a splash of cream at the end—rich, but almost too much (my cousin LOVED it, though).
- Once tried lemon zest—meh, didn’t love how it mixed with the butter. Lemon wedges on the side work better.
Equipment (But Don’t Sweat It)
- Large skillet, preferably cast iron (though I know some folks are loyal to their trusty nonstick—no judgment)
- Tongs or a big spatula
- Rolling pin or, honestly, a heavy mug for pounding chicken (sounds ridiculous, but it works)

Keeping Leftovers—If You Have Any
Just pop leftovers in an airtight container and refrigerate. It’ll keep for about 2 days—though honestly, in my house, it never lasts more than a day. I think it tastes even better reheated, maybe because the flavors get a little more cozy. If you want to freeze it, go for it, but the sauce sometimes splits a bit.
How We Serve It (Feel Free To Steal My Traditions)
I love it over mashed potatoes, because you need something to mop up all that buttery sauce. Rice works too. My sister swears by buttered noodles (guess butter runs in our blood). We’ve also made little sandwiches with leftovers; it’s messy, but so good.
Pro Tips—AKA What Not To Do (Learn From My Goofs)
- I once tried rushing the sauce—don’t. Let the garlic gently cook in the butter. Burned garlic = sadness in a skillet.
- Be patient with the chicken; if you flip it too soon, it’ll stick. Just let it do its thing.
- If it looks weird halfway, trust the process. It always comes together. I promise.
FAQ—People Actually Ask Me This Stuff!
- Can I make this dairy-free? Eh, you could try vegan butter, but it’s not quite the same. Maybe olive oil? Haven’t tested it, though.
- How do I know when the chicken’s done? A meat thermometer is handy—165°F is the magic number. Or, just slice into the thickest bit and check (I do this more often than not, honestly).
- Is this like traditional Indian butter chicken? Nope, totally different! This one’s more Texas Roadhouse than Mumbai. If you want a classic Indian version, check out this recipe from Serious Eats.
- What if I don’t have paprika? Smoked paprika adds a nice touch, but regular paprika, ancho chili powder, or honestly, nothing at all works fine. I skip it sometimes.
- Any side dish ideas? Oh, for sure. I love this with garlic mashed potatoes or just a pile of roasted veggies. Or, salad if you want to feel healthy.
Anyway, give it a shot—let me know how yours turns out. Or if you mess it up, at least you’ll have a funny story. Happy cooking, y’all!
Ingredients
- 4 boneless, skinless chicken breasts
- 1/2 cup unsalted butter
- 4 cloves garlic, minced
- 1 teaspoon paprika
- 1 teaspoon dried parsley
- 1/2 teaspoon black pepper
- 1 teaspoon salt
- 1/2 cup heavy cream
- 1 tablespoon olive oil
Instructions
-
1Season the chicken breasts with salt, black pepper, and paprika on both sides.
-
2Heat olive oil in a large skillet over medium-high heat. Add the chicken breasts and cook for 5-6 minutes per side, until golden brown and cooked through. Remove chicken from skillet and set aside.
-
3In the same skillet, reduce heat to medium and add butter. Once melted, add minced garlic and cook for 1-2 minutes until fragrant.
-
4Stir in heavy cream and dried parsley. Simmer for 2-3 minutes, allowing the sauce to thicken slightly.
-
5Return the cooked chicken breasts to the skillet, spooning the butter sauce over the top. Simmer for an additional 2-3 minutes to heat through.
-
6Serve hot, garnished with extra parsley if desired.
Approximate Information for One Serving
Nutrition Disclaimers
Number of total servings shown is approximate. Actual number of servings will depend on your preferred portion sizes.
Nutritional values shown are general guidelines and reflect information for 1 serving using the ingredients listed, not including any optional ingredients. Actual macros may vary slightly depending on specific brands and types of ingredients used.
To determine the weight of one serving, prepare the recipe as instructed. Weigh the finished recipe, then divide the weight of the finished recipe (not including the weight of the container the food is in) by the desired number of servings. Result will be the weight of one serving.
Did you make this recipe?
Please consider Pinning it!!


